
Premium components are advanced features that enhance the functionality and customization of forms. Here, you will learn about each component and its unique capabilities to improve user experience and streamline form creation.
|
Component |
Description |
|---|---|
|
Upload files to a form from your mobile camera or local machine. |
|
|
Reuse forms by inserting child forms into parent forms. |
File
The File component allows form users to upload and download files within a form. Additional settings such as file display, enabling webcam for mobile devices, and file type validations can be configured.
Note: To use the File component, file storage must be configured by choosing either the Base64 option or the Temporary Storage option.
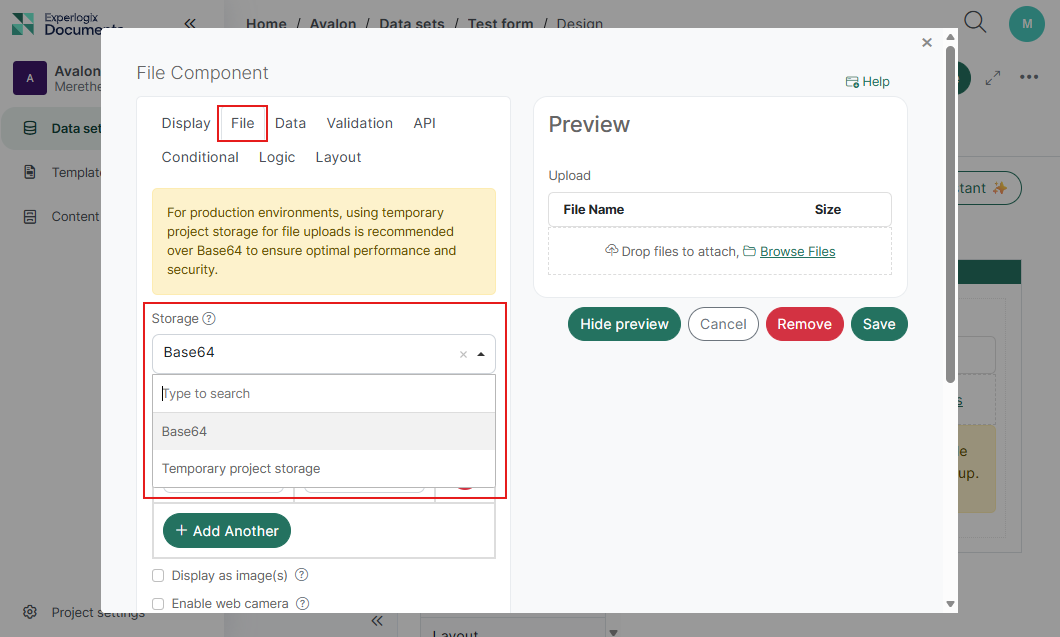
Recommendation: For production environments, using temporary project storage for file uploads is recommended over Base64 to ensure optimal performance and security.
|
Unique Setting |
Description |
|---|---|
|
Storage |
Specifies where uploaded files are stored and accessed. Options include Base64 and Temporary Project Storage. |
|
Upload Only |
Restricts the component to only allow file uploads. Download functionality is disabled. |
|
Display As Image(s) |
Renders uploaded image files directly in the form view instead of showing file links. The filter in the file explorer will be set to the Image Files type on upload. |
|
Enable Web Camera |
Allows users to capture images directly using a connected webcam or mobile camera. |
|
Webcam Width |
Specifies the pixel width of the webcam capture area. |
|
File Types |
Lets users categorize uploaded files by type (e.g., document, image, audio). Useful for multi-type uploads. |
|
File Pattern |
Defines allowed file extensions (e.g., .jpg, .pdf). Files not matching the pattern are blocked. |
|
File Minimum Size |
Sets the smallest allowable file size for uploads (in bytes, kilobytes or gigabytes). |
|
Enable Device Capture |
Enables access to device-specific cameras, such as front or rear cameras on mobile devices, for image capture within the form. |
|
File Maximum Size |
Sets the largest allowable file size for uploads (in bytes). |
Automated malware scanning at submission
When users upload files via a web form tied to a web form data set, Experlogix Documents automatically runs a security scan during submission. The scan is designed to detect malicious content and mitigate the risk of potentially harmful files reaching your workflows or storage.
This built-in safeguard is particularly crucial for public-facing forms, where file upload may expose the system to malicious content.
Important
Files larger than 2 GB bypass malware scanning. We strongly recommend configuring your form's upload limit to 2 GB or less when malware scanning is required.
If a form designer configures an upload limit above 2 GB, the system displays a warning indicating that files exceeding the scanning threshold will not be scanned.
Security Note: Malware scanning is designed to mitigate security risks associated with file uploads but does not guarantee detection of all malicious content. Users should apply appropriate file upload restrictions and security practices based on their organization's requirements.
Note: Malware scanning currently applies only to files stored in temporary project storage. Files uploaded using Base64 encoding are not scanned.
When Malicious Content is Detected
If a file is flagged as malicious during the scan, the system restricts all further interaction with it. No action can be taken on the compromised file other than deletion. If a user attempts to use or interact with a flagged file (for example, opening a sample or previewing/executing a PDF template), the system will display the following error message:
"File Access Failed. Malicious File(s) Detected."
Nested Form
The Nested Form component allows you to insert an existing form (child form) into another form (parent form). All fields within the child form will be displayed in the parent form. Once the child form has been created within the same project, simply drag and drop the Nested Form component onto the parent Form and select the child Form. The Nested Form component will display as an empty component in the builder, but will display the child Form fully when rendered.
|
Unique Setting |
Description |
|---|---|
|
Form |
Select the child Form or Resource to embed within the parent form. |
Nested Form Privacy Compatibility
To prevent inconsistent behavior and access issues, it is highly recommended that both the parent form and its hosting context use identical privacy settings (Public/Public or Private/Private).
Validation Rules for Nested Forms
To ensure data security, the system applies specific validation rules:
-
Private Parent Forms: Can include both public and private nested forms.
-
Public Parent Forms: If a private form is added inside a public parent form, the nested form will not render for end users.
To prevent this, the form builder applies validation and guidance logic when adding a Nested Form component:
-
Only compatible public forms are available for selection.
-
Private forms are automatically filtered out.
-
UI guidance and notifications explain why some forms are unavailable.
This helps prevent invalid configurations and ensures nested forms render correctly in public forms.
-
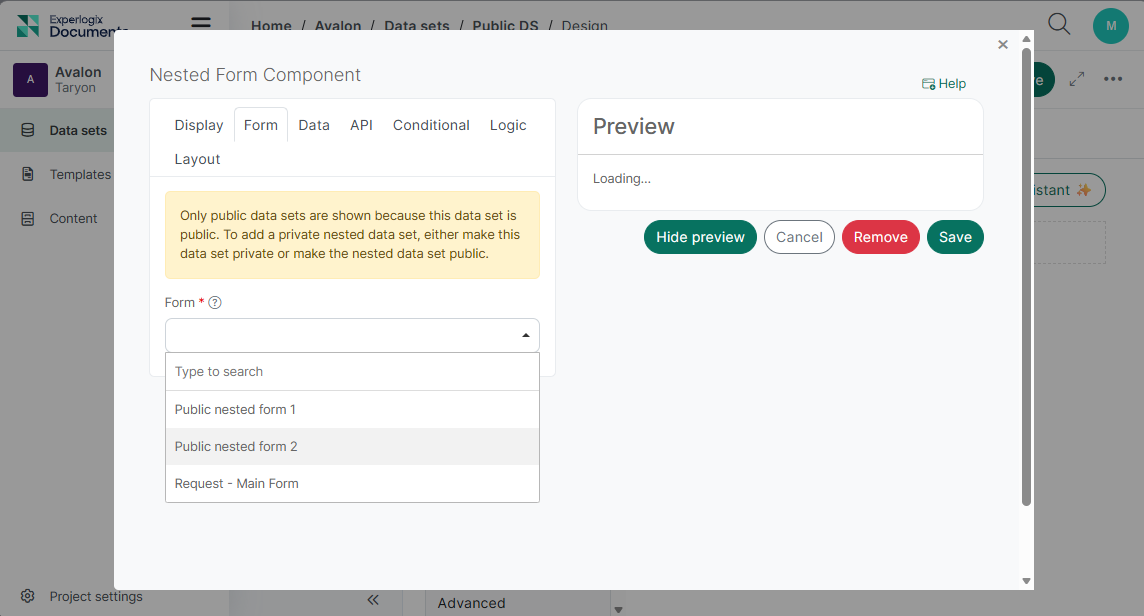
If the Parent form was created before Documents Automation version 1.0.0-preview.28 (Experlogix Documents Release Notes 1.0.0-preview.28), private forms will still appear in the list of available forms. Please review and adjust privacy settings to ensure consistency.
Privacy Changes:
If you change an existing private parent form to Public while it contains private nested forms, the system will display a warning message to help prevent configuration conflicts and rendering issues.
"Privacy mismatch detected. One or more nested data sets are private. This will prevent them from displaying to end users when rendered publicly. Please review and adjust the privacy settings as needed."
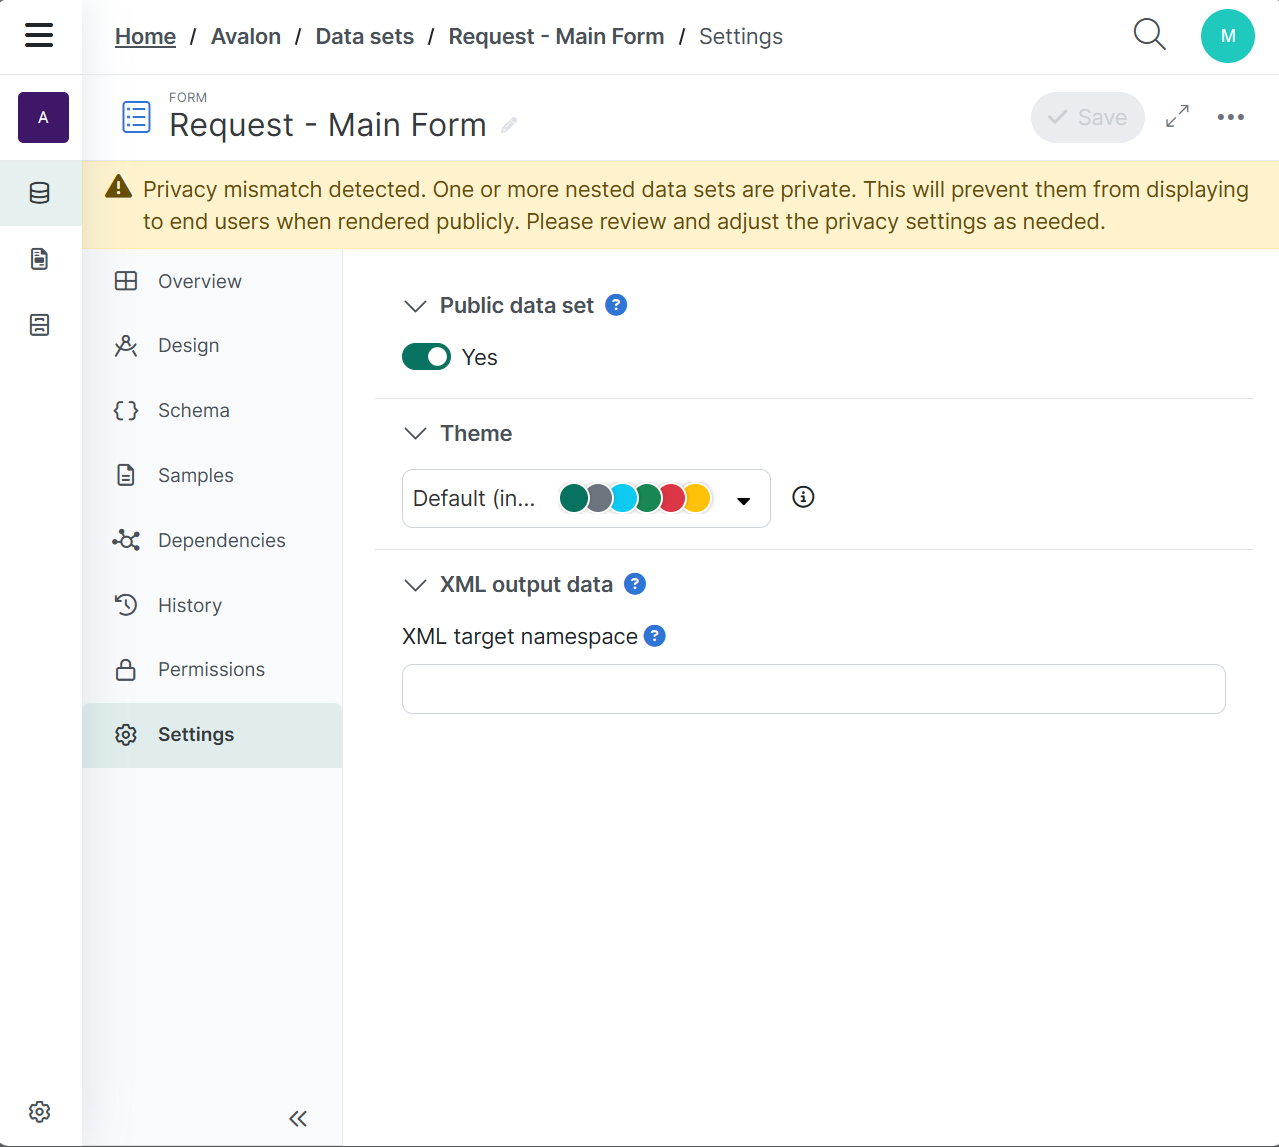
Recommended Action: Adjust the privacy settings of the parent or nested form(s) to align with Validation Rules for Nested Forms.