
Project Themes in Experlogix Documents provide a powerful way to personalize the look and feel of your project environment. Themes allow you to define and apply custom color schemes across your project’s user interface. With just a few clicks, you can create, apply, and manage themes that enhance both the aesthetics and usability of your project environment.
Applying a project theme allows you to define custom colors, enabling differentiation between projects. This is ideal for managing multiple product lines.
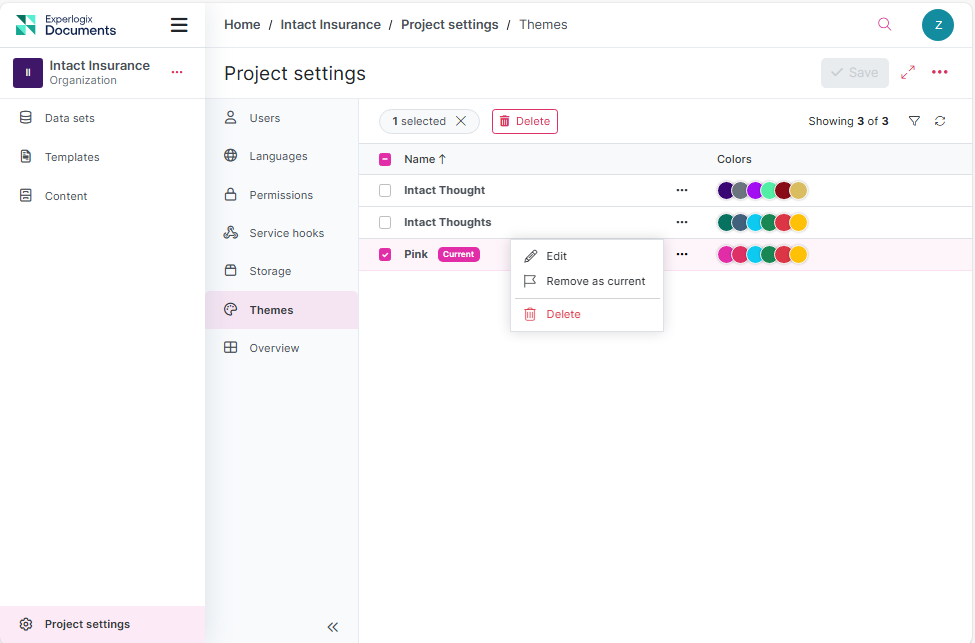
|
Field Name |
Description |
|---|---|
|
Theme List |
Displays all saved themes for the project. |
|
Create New Theme |
Button to create a new custom theme. |
|
Theme Name Field |
Input field to name the theme. |
|
Edit |
Modify the colors of a saved theme to update its appearance. |
|
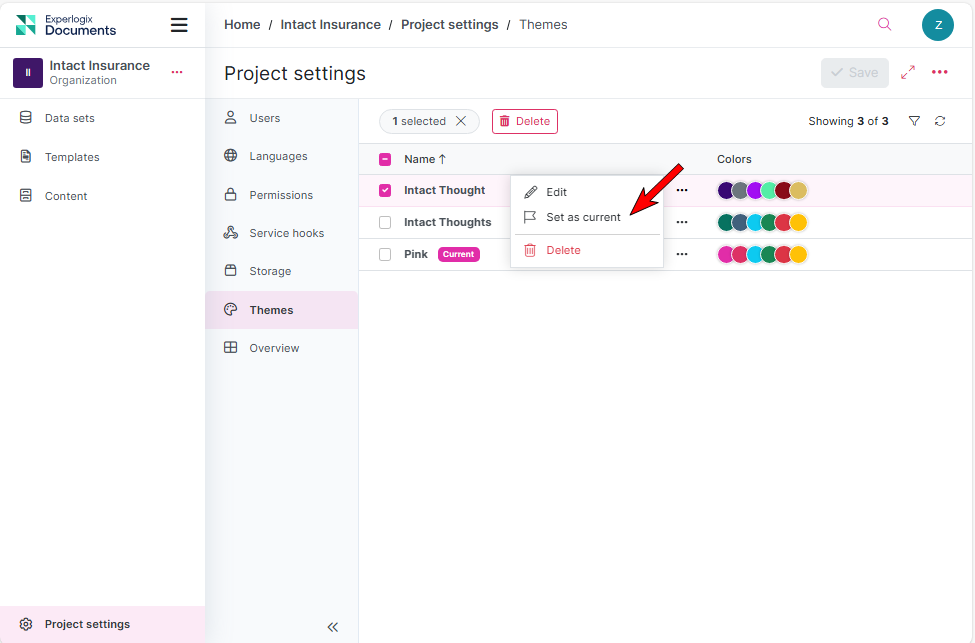
Set as Current/ Remove as current |
Applies the selected theme to the project. When a new theme is set as current, any previously active theme is automatically removed from use but remains saved for future use. |
|
Delete |
Permanently removes a saved theme. |
Procedures
In the following sections, you’ll learn how to access the Themes user interface, create and name a new theme, apply it to your project, and manage existing themes effectively.
Your license must include the Themes customization for this to be available.
Accessing the Project Settings Themes Tab
-
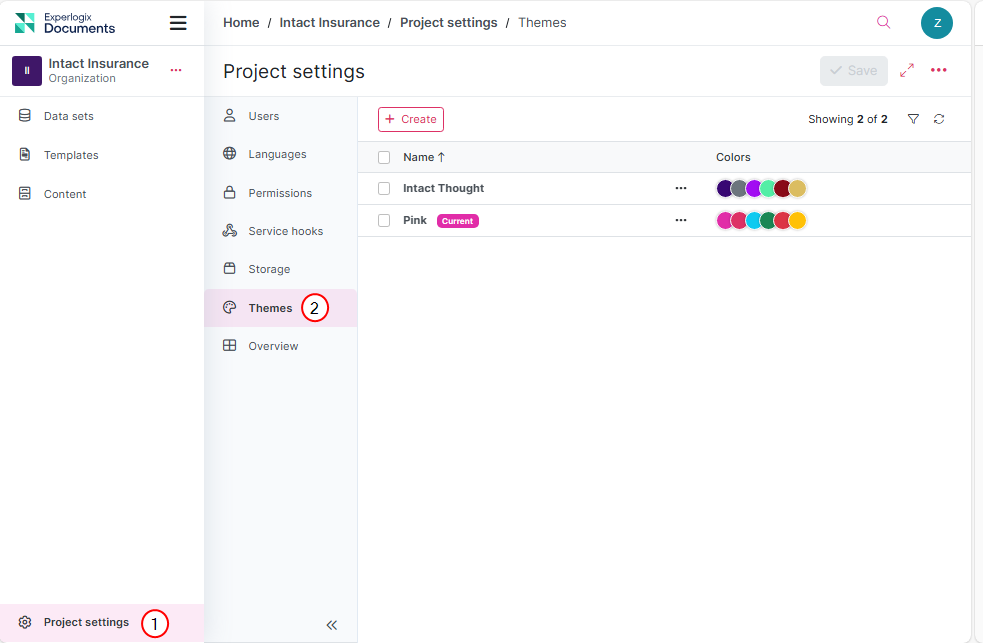
Navigate to Project Settings in Experlogix Documents.
-
Select Themes.
The Project Settings Themes Tab displays.
You must have the Write project permission to customize themes.
Creating a New Theme
Creating a new project theme is a straightforward process that gives users control over the color palette used across the project’s user interface. From form fields and buttons to alerts and switches, every visual element can be styled to reflect your desired color.
When creating a new theme, you can define:
-
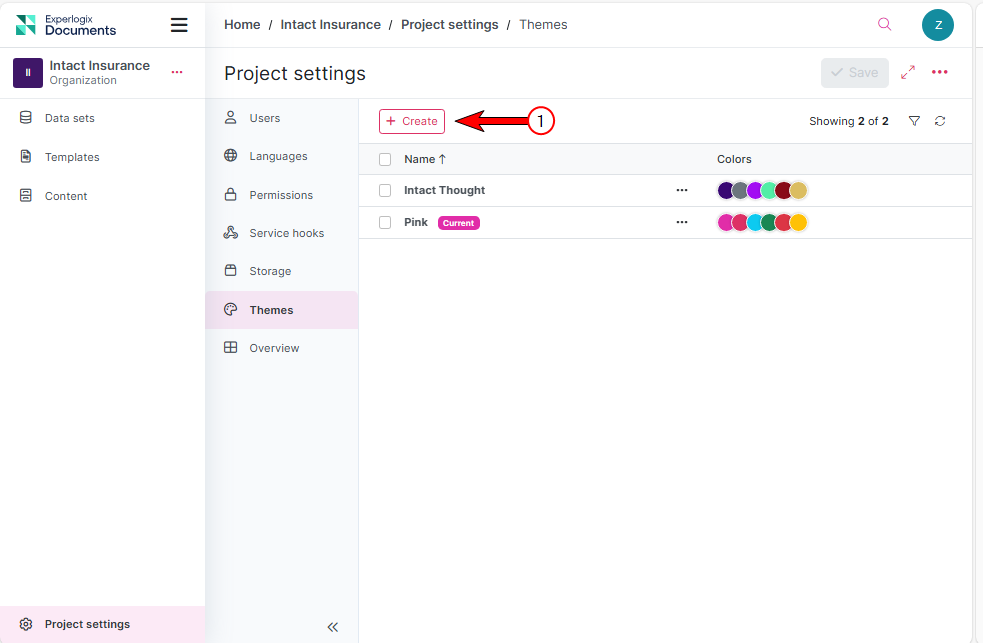
Select Create inside Project Settings Themes Tab.
-
Give your theme a name.
-
Select Create.
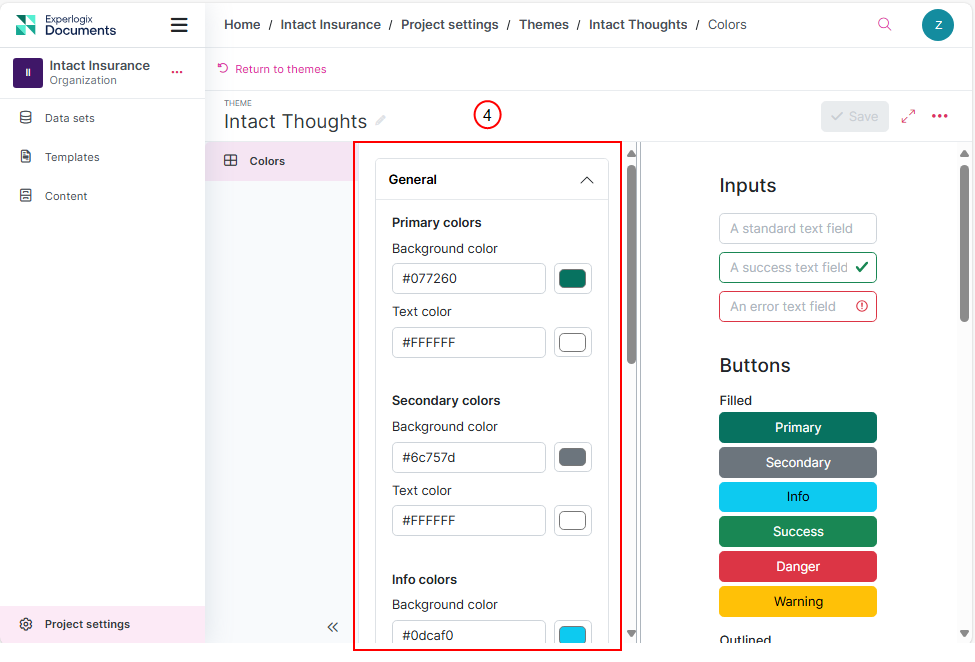
A new theme edit view displays for customization.
-
Define the following color categories using the color pickers:
|
Customization Area |
Description |
||||||||||
|---|---|---|---|---|---|---|---|---|---|---|---|
|
Primary and Secondary Colors |
Used for key user interface elements such as buttons, headers, and interactive components.
|
||||||||||
|
Notification Colors |
Customize the appearance of various types of system notifications:
|
As you select colors, a live preview panel will update to show how your theme looks.
-
Select Save.
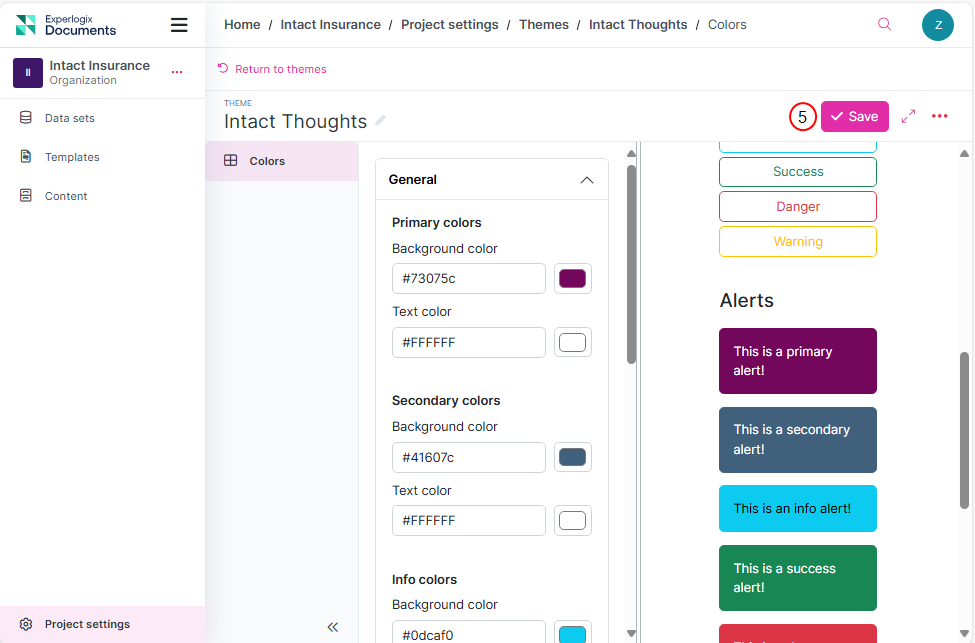
The success message displays.
Setting a Theme as the Current Theme
To activate a theme or remove another from use, simply select Set as Current next to the desired theme. This applies to the project and automatically deactivates any previously active theme.
Restoring Default Colors
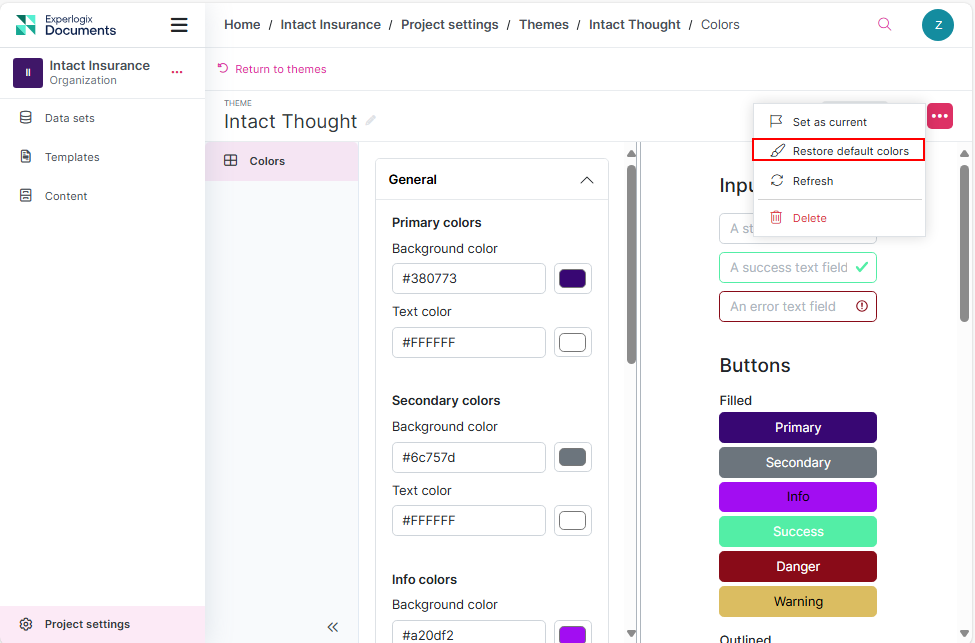
To restore the default Experlogix theme, select Restore default colors in the Theme tab. This will deactivate any custom theme and reapply the system’s default styling.
Deleting a Theme
-
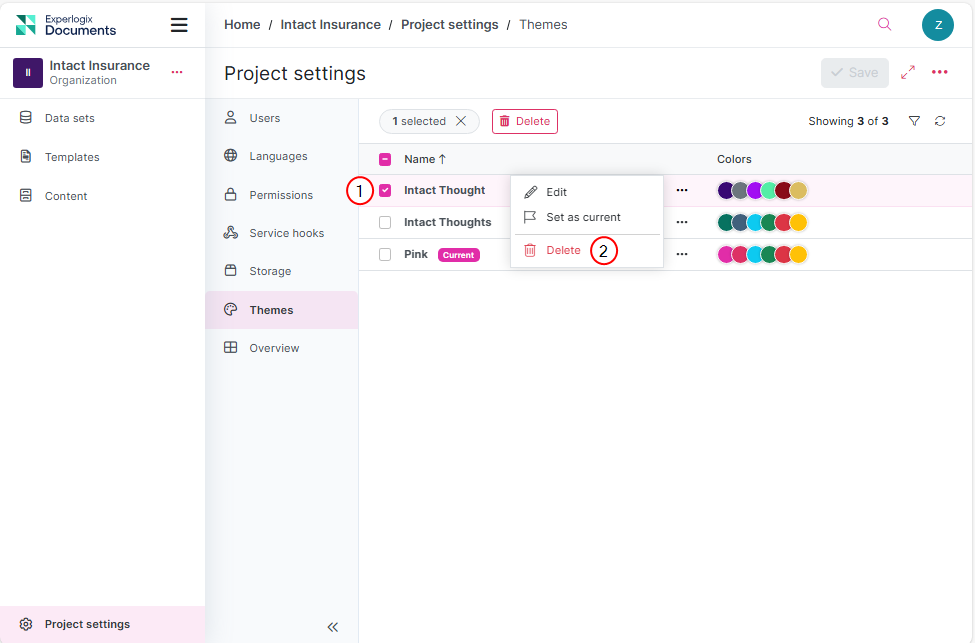
Select a theme you want to delete on the Project Settings Themes List view.
-
Select Delete.
You cannot delete a theme that is currently active. Set another theme as the current first.
-
Select Delete on the confirmation dialog that displays.
The success message displays, and the Project Settings Themes List view is updated.