
Streamline your workflow and ensure flawless consistency across all documents with project-level Field Formats. This feature allows you to establish a single source of truth for your data by defining a default format for a given field type, which is automatically applied to all mappings of that field type across your templates without the need for manual configuration.
Example: A template designer needs to generate invoices for customers in both the US and Spain. Instead of manually formatting the "Invoice Date" field inside every single template, they create a Date/Time Field Format at the project level and define a language-specific rule for Spanish.
Result: Whenever a date field is mapped in a Spanish template, the system automatically applies the correct (Spanish) Date/Time format. The designer ensures flawless consistency across all documents without repetitive manual work.
Key Capabilities
-
Global Control: Project administrators and owners can set global defaults and manage language variants seamlessly.
-
Flexible Styling: Users can choose from a curated list of predefined formats or specify their own custom formats.
-
Granular Overrides: Designers retain ultimate flexibility, with the ability to apply precise manual overrides at the individual template mapping level when needed.
Permissions
Administrators and owners can create, view, edit, and delete formats. These permissions are also available for privileged users to assign via custom permission groups.
For detailed instructions on how to set up permissions, please visit the Organization Permissions Tab section.
Field Formats View🔗
To find all your project's field formats, navigate to Project Settings > Field Formats
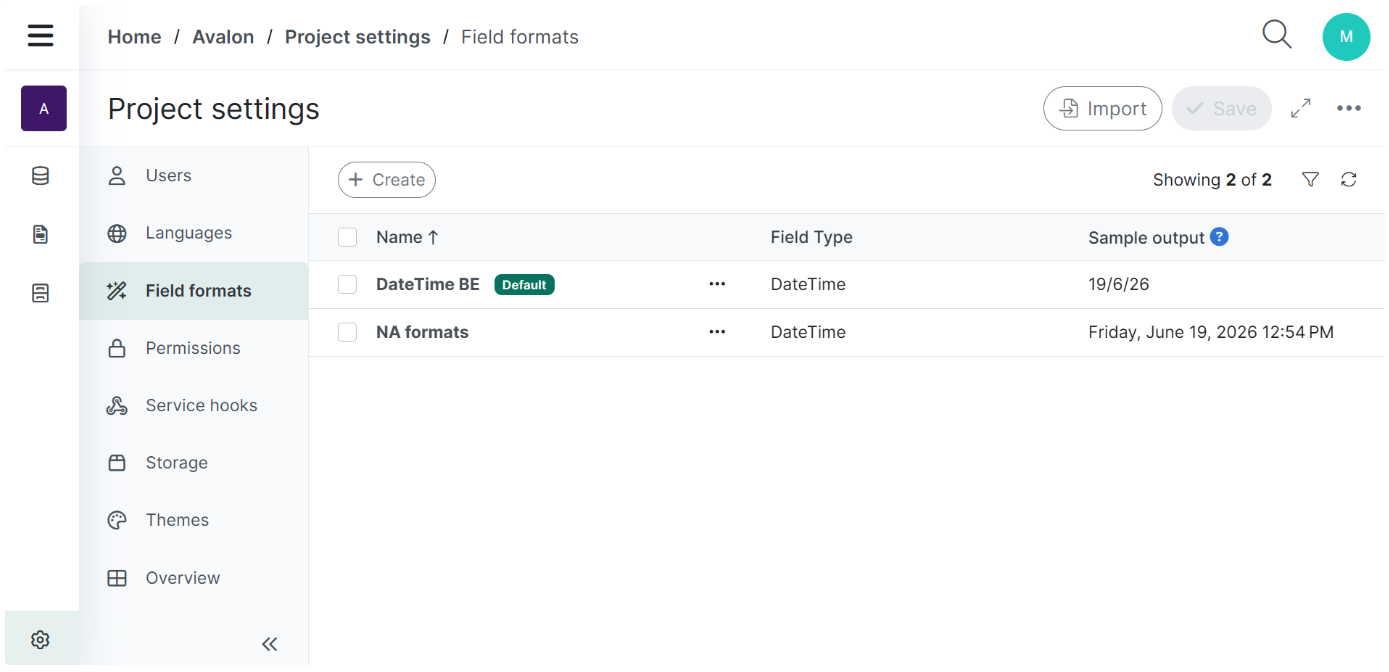
The view displays the available formats listed in alphabetical order and the following metadata:
-
Name (with default tag)
-
Field Type
-
Sample Output.
Sample Output is a live preview illustrating exactly how the data will appear in your generated documents using this format (for example, showing the current date and time formatted according to your rule).
This helps you instantly verify that the format behaves as expected without needing to generate a test document.
The default format is clearly identified with a tag next to its name. Clicking a format opens its edit view. Users can also filter the list by Field Type and format name.
Setting Up a Mapping Field Format
Project administrators and privileged users can easily create and manage standardized formats for supported field types. With full multi-language support built-in, you can define global defaults or seamlessly adapt formats to match regional standards across all templates languages.
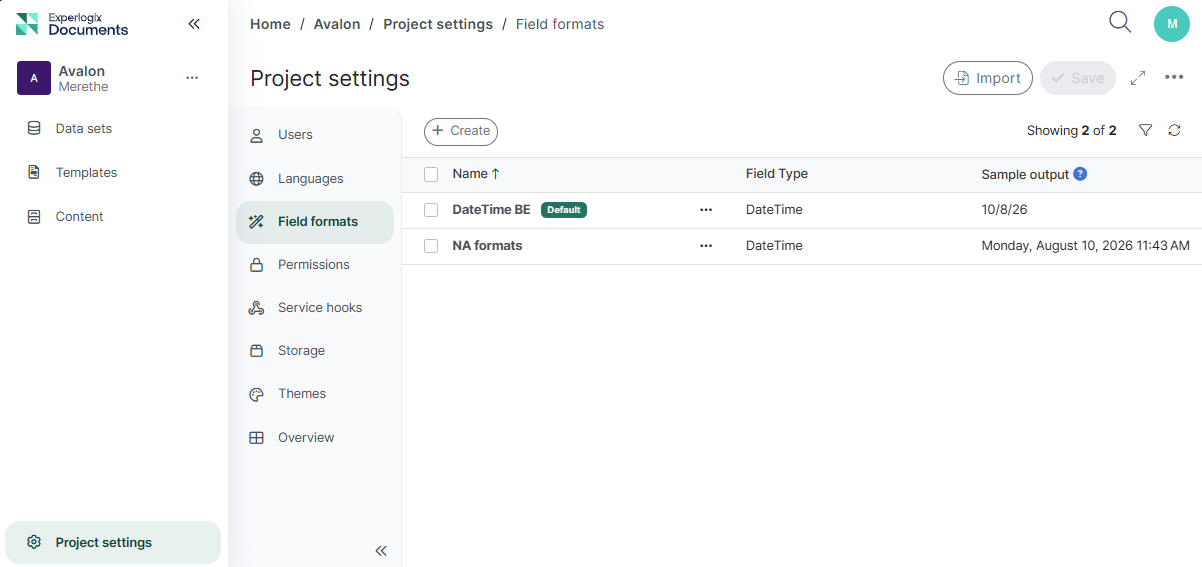
To configure a field format:
-
Navigate to Project Settings > Field Formats.
-
Select the Create button.
A "Create Format" pop-up will appear. -
Enter a Name for your format, choose the Field Type, and add an optional description.
In the current release, DateTime is the only supported field type.
-
(Optional) Use the “Default” toggle to set up the format as Default.
-
Select Save to save the new format.
This redirects you to the Format Edit view.
Managing Formats
Admins and privileged designers can update a format by changing its name, properties, or setting it as the default.
To access the Format Edit view:
-
Go to Project Settings > Field Formats tab.
-
Select the format you want to edit
or
Select Edit from the actions menu next to the format name.
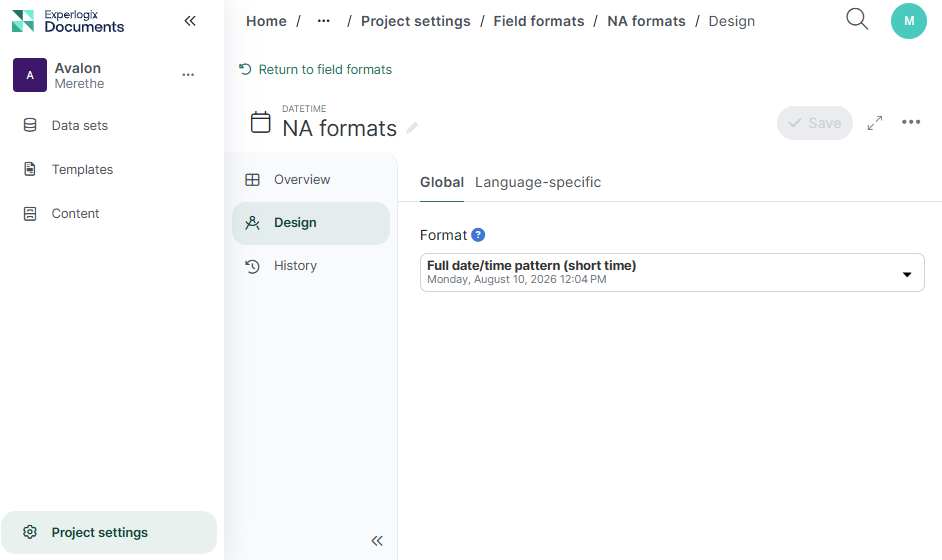
The Format Edit view consists of three main tabs:
-
Overview: See or Edit format name and description, set the format as Default.
-
Design: Define Global or Language-specific formats.
-
History: Track all changes, view versions, and roll back if necessary.
Important: Updating a format automatically updates all instances where it is applied. You will receive a warning: "Are you sure you want to update this format? These changes will be applied to all mappings and templates that currently use it."
Overview tab
The Overview tab offers you to modify two options:
-
Enter or Edit the format’s Description.
-
Set the format as Default.
Once applied, the format will receive a "Default" tag in the list view, and it will be used automatically across your project for all template mappings that use this specific field type.
Example: A project administrator creates a customized Date/Time format for their company's standard reporting and sets it as the Default format.
Result: Every time a user maps a Date/Time field (such as "CreationDate" or "ExpiryDate") in any template, this default format is instantly applied to the mapping. The user only needs to intervene if they want to manually override it by selecting a specific format.
Design tab
The Design tab is the primary workspace where you configure how your data is rendered. This tab contains two sub-sections (Global and Language Specific) allowing you to define base rules and regional overrides.
Regardless of which tab you are configuring, you can choose between two formatting styles:
-
Predefined: Select an option from the dropdown list of available standard formats.
-
Custom: If none of the predefined formats meet your needs, scroll to the very end of the dropdown and select "Custom" to specify your own format.
For more guidance on writing custom formats, see Microsoft’s documentation on Custom date and time format.
Note: Only one custom format can be applied at a time; selecting a custom format will override any predefined format selections.
Define the Global Format
The Global tab is used to establish the base format across languages.
"Global" and "Default" serve different purposes:
-
Making a format Default applies it automatically to template mappings.
-
Configuring a Global rule for a format, whether it is the default format or not, ensures that the format’s design is applied across all languages in your project, unless it is explicitly overridden for a specific language.
To set up the Global format:
-
On the Global tab, select your preferred formatting style (Predefined or Custom).
Formats in the dropdown are shown in the project's default language. -
Click Save to apply the changes.
Define Language-Specific Format
To set up a distinct format for a specific language, you can use the Language Specific tab to tailor how data is rendered for that locale. This screen displays all available project languages and shows how the global base format renders for each.
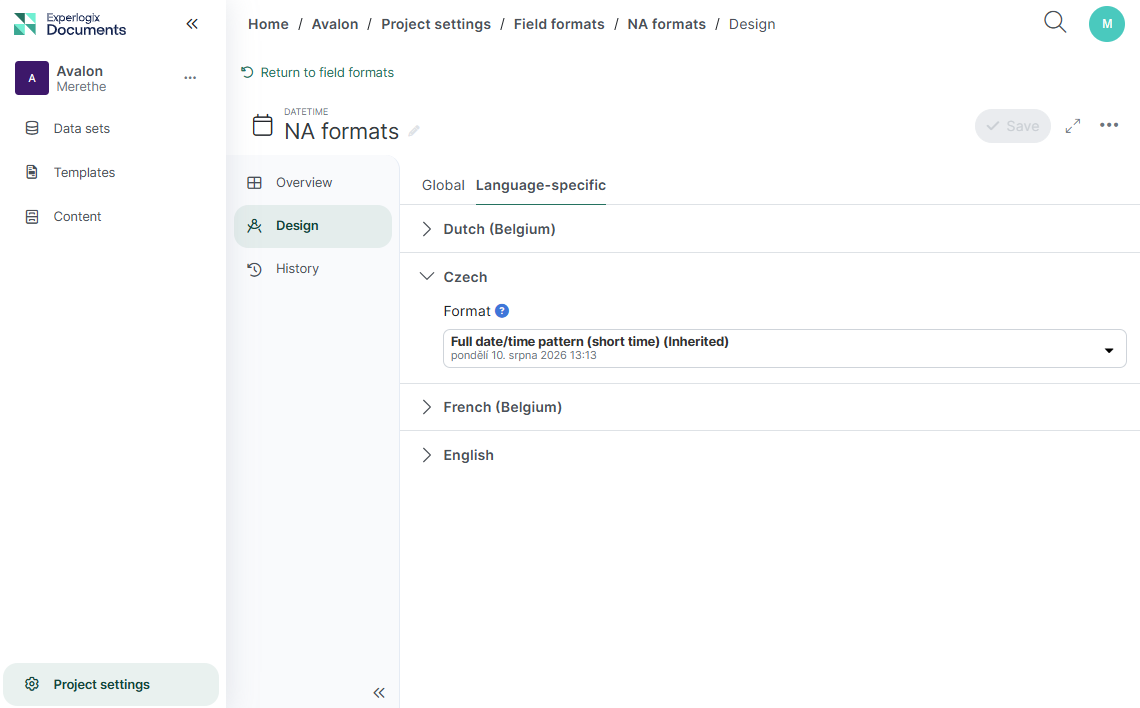
To design language specific formats:
-
Switch to the Language Specific tab.
If no global format is defined yet, you will see a message: "No format has been defined yet. Create a format in the Design Tab to see how it will apply across project languages".
Formats that inherit the global rule will display an Inherited label.
-
To override the base format for a specific language, select a different predefined format or create a custom one.
-
Select Save to apply the changes.
Once saved, these rules will automatically apply to all templates utilizing that language.
Note: Overrides apply only to the selected language and do not affect the base global format. You can revert a language variant back to the inherited format at any time by simply selecting the Inherited option again from the dropdown list.
Example:
Imagine you have a global project spanning multiple regions.
By configuring language-specific settings, you can ensure that your English template automatically renders the UK date format (DD/MM/YYYY), while your Czech template perfectly matches the local Czech standard (D. M. YYYY).
Everything adapts seamlessly without manual template changes.
History tab
The History tab allows you to track and manage all modifications made to your formats over time. This includes changes to both the base global format and any language-specific overrides.
Within this tab, you will find two main sections: Versions and History.
Use the language dropdown menu at the top of the view to select which context you want to manage:
-
Global: Displays the history and versions of the global base format.
-
Specific Language: Displays only the history and versions specifically related to the selected language.
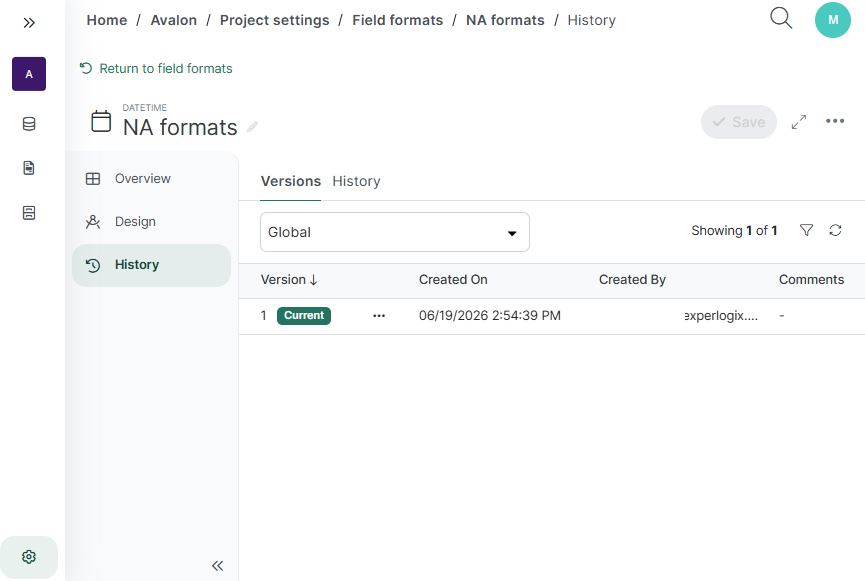
History
The History section provides a chronological log of events for the format. You can easily track when a format was created, updated, or when a specific language override was applied.
Versions
A new version is automatically created whenever the base format is modified or an override is applied to a specific language.
The Versions section allows you to manage the saved states of your format: rollback to a previous version and add/edit comments.
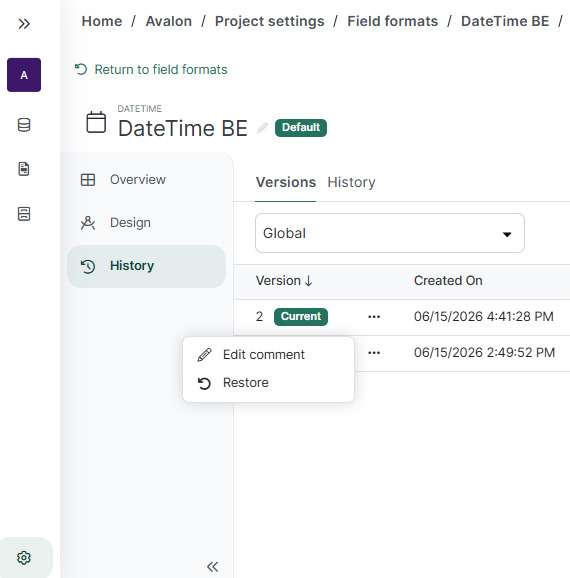
To roll back to a previous version:
-
Ensure you have the correct language context selected from the dropdown list.
-
Locate the version you want to restore in the list.
-
Open the actions menu next to that version.
-
Select Restore.
The format will instantly revert to the properties of that selected version.
To add/edit a comment to a version:
-
Ensure you have the correct language context selected from the dropdown list.
-
Locate the version you want to add a comment for.
-
Open the actions menu next to that version.
-
Select Edit comment.
Deleting Formats
Deleting a format is a permanent action. When you confirm the deletion, any mappings that were using the deleted format automatically adopt the default format for their category.
If the deleted format was the default, the project falls back to the system settings for that category.
-
Go to Project Settings > Field Formats tab
-
Select Delete from the actions menu next to the format name
or
open the Format Design screen and select Delete from the actions menu in the top right corner.
The Delete confirmation pop-up will open. -
Confirm your choice to permanently remove the format.