
The Data Sets Design Tab enables users to craft or import Data Sets schemas. This document will cover the different views available for JSON, XML, and Form Data Sets, and provide step-by-step procedures for importing schemas, generating schemas from data, editing schemas, and adding translations to form data sets. Additionally, it covers how to preview form translations and navigate the Data Set Tree View, ensuring users can efficiently manage and visualize their data sets.
Design Tab Views
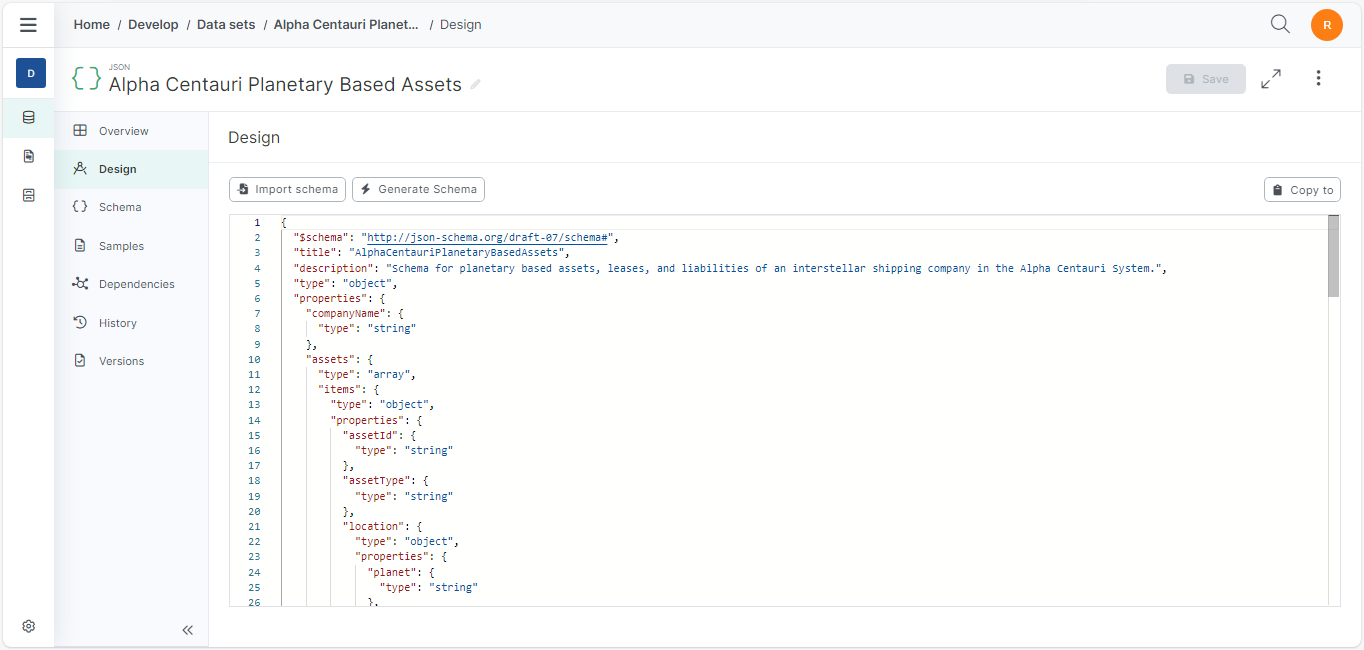
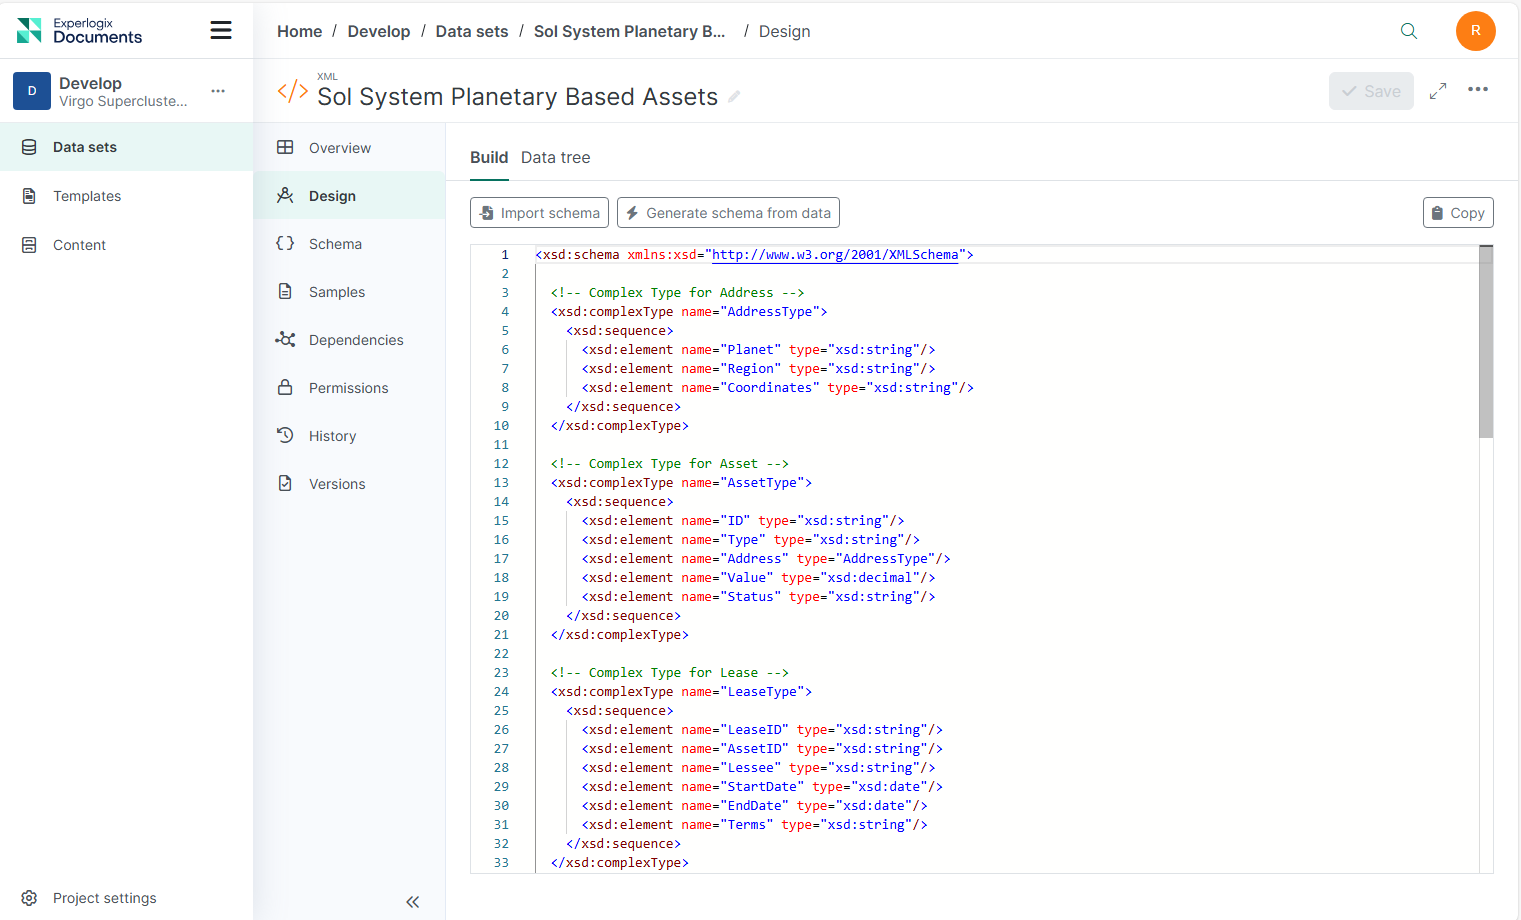
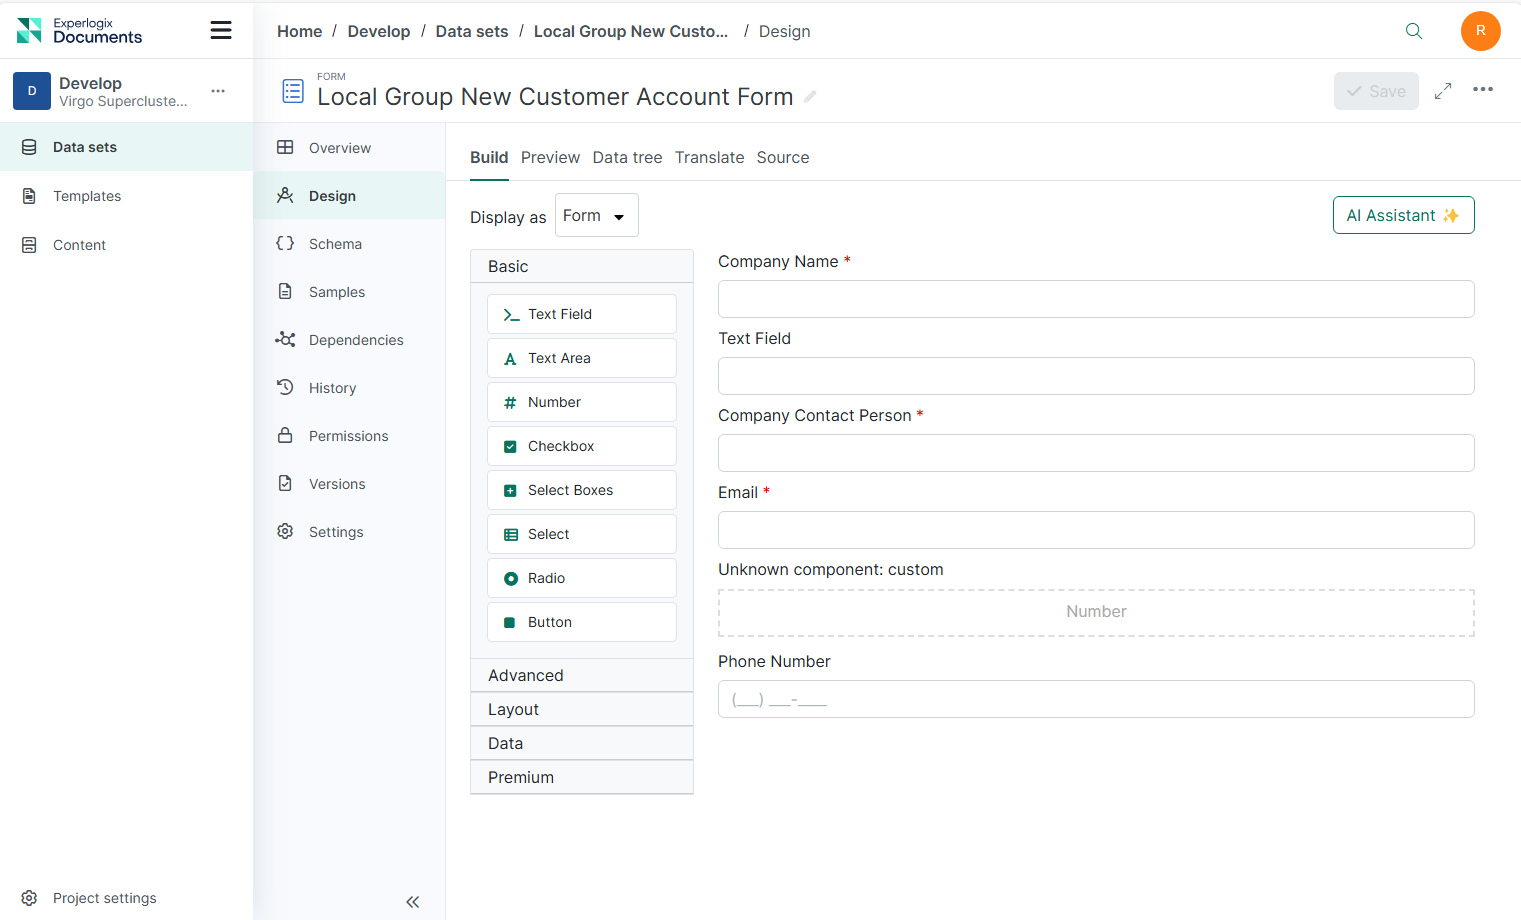
The Data Sets Design Tab looks different depending on if you're viewing it for a JSON Data Set, an XML Data Set, or a Form Data Set.
JSON Data Set
XML Data Set
Form Data Sets
Data Set Tree View
The Data Set Tree View provides a hierarchical representation of data sets, enabling users to visualize fields easily. This is available in the Data Sets Design tab, Template Designer, and Flow Designer.
Tree View Navigation
The Data Tree view has a collapsible entity tree that displays entities and their relationships. You can expand entities to reveal their relationships or collapse them to hide the details.
Additionally, there is Schema names toggle to switch between displaying entity names and schema names.
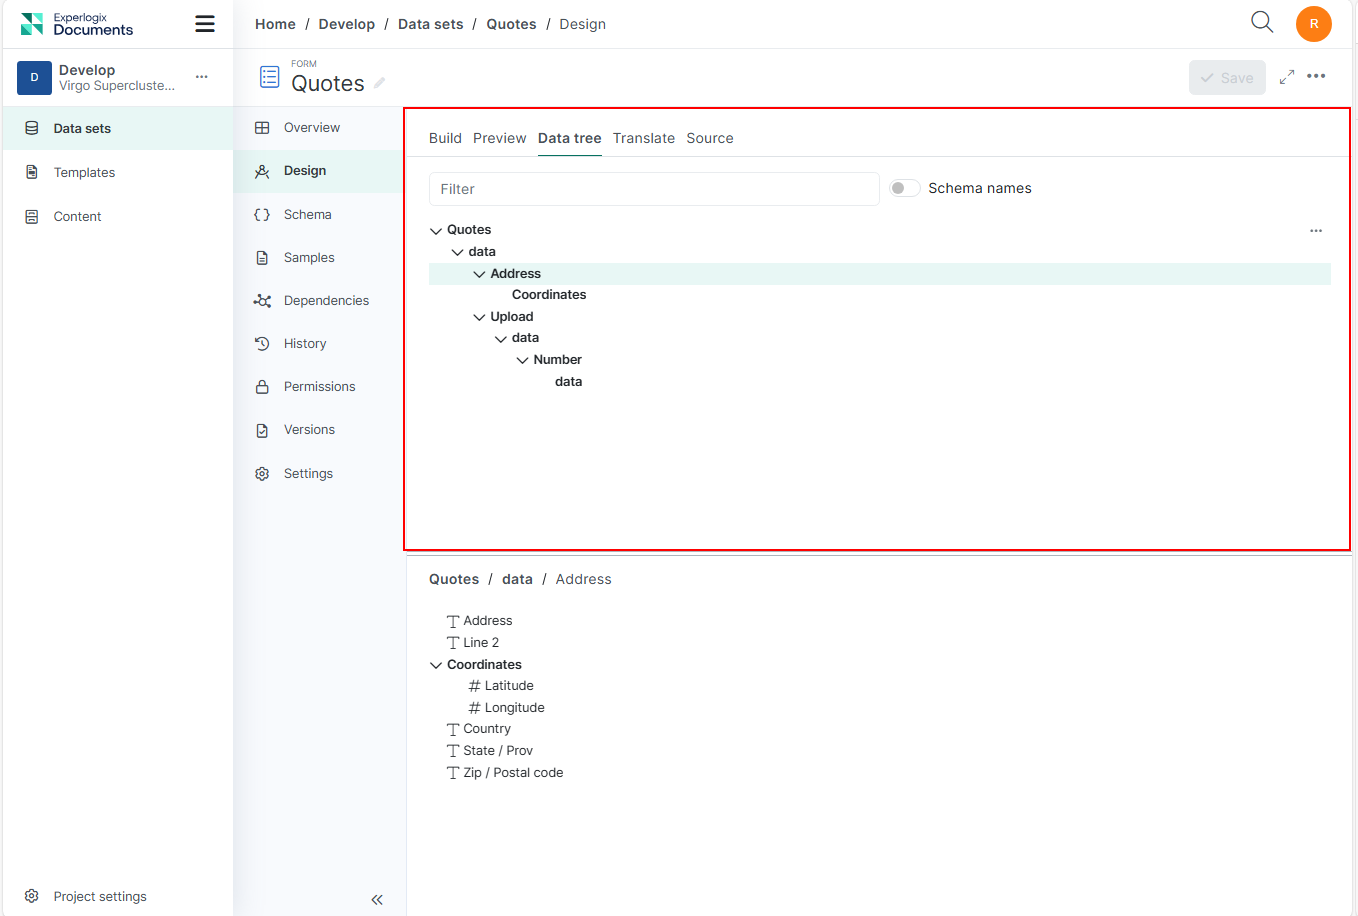
Just below the entity list is the Field list area.
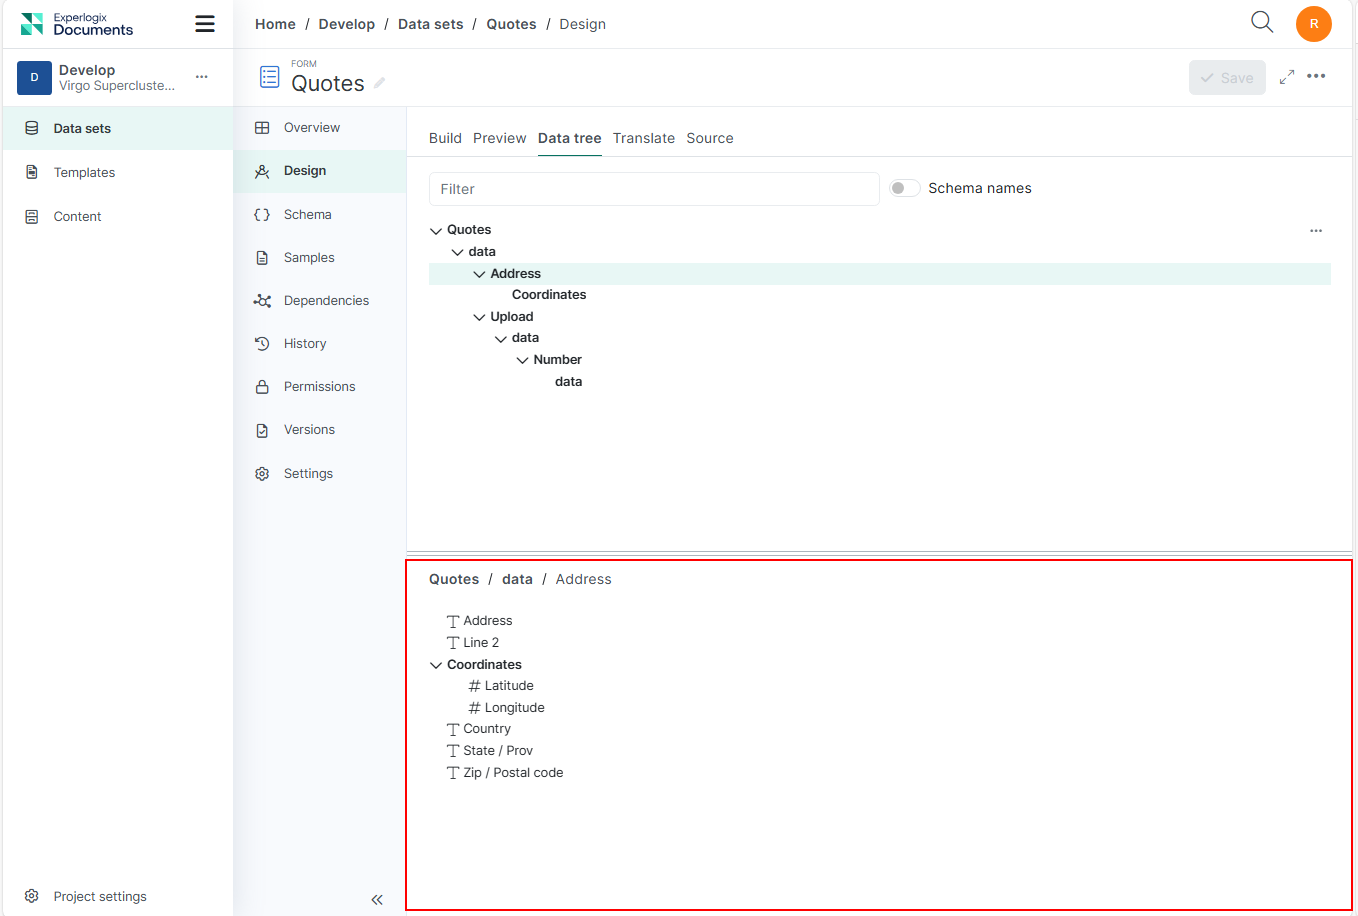
When you select an entity in the data tree, the fields area shows the fields of the selected entity in alphabetical order. Child entities and their fields are also alphabetically displayed, with indentation indicating hierarchy. Fields are accompanied by icons indicating their type. Supported field types include:
-
Text
-
Number
-
Date/Time
-
Boolean
-
Binary
The breadcrumb trail at the top of the Field list area shows your current navigation path.
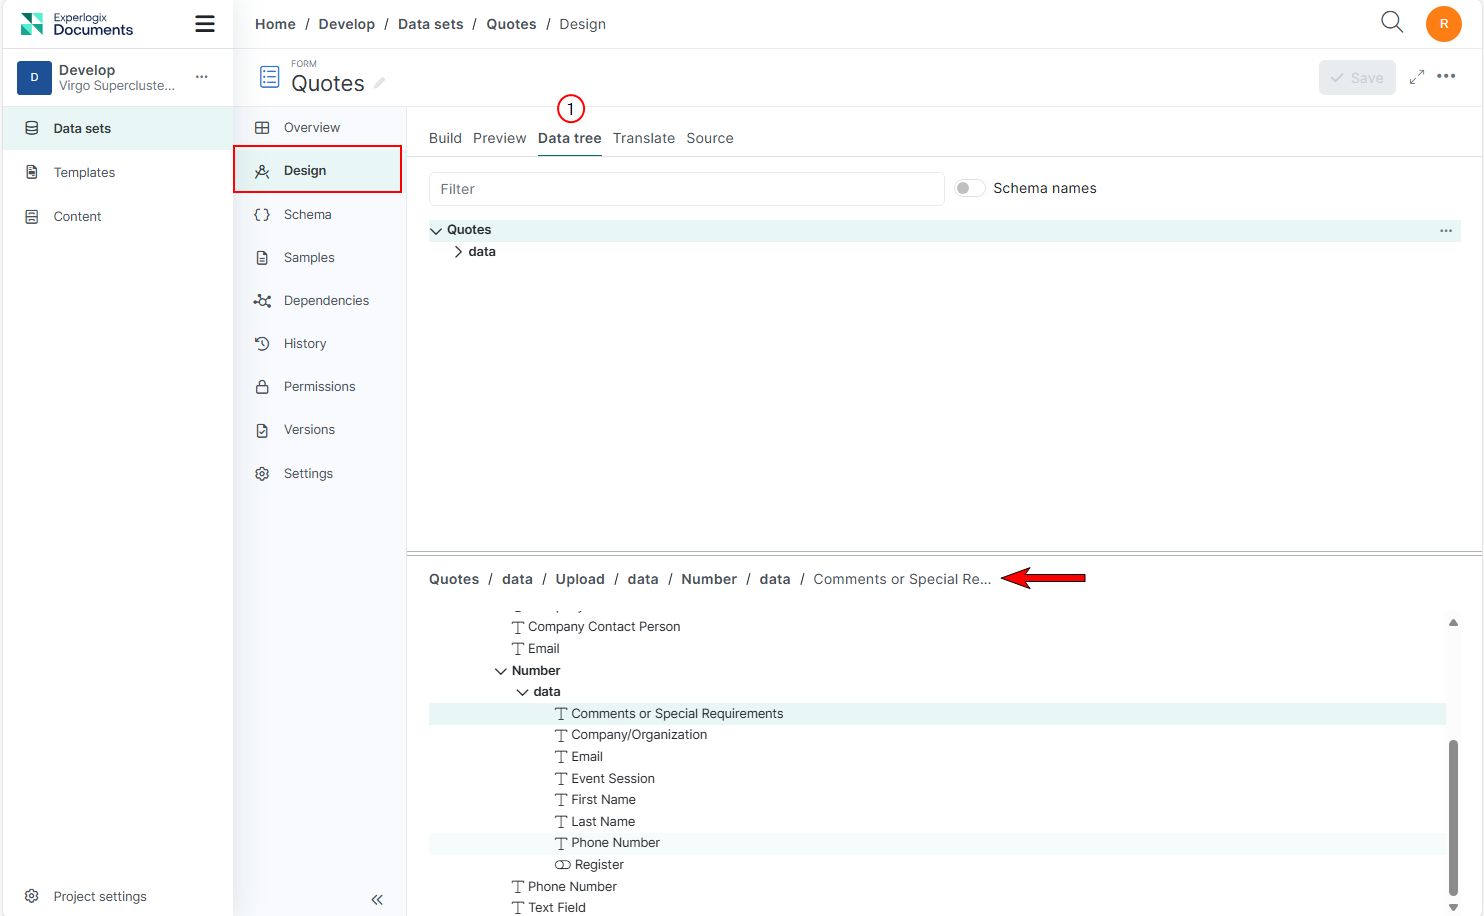
Each part of the breadcrumb, except the active item, is selectable. Selecting a parent field in the breadcrumb updates the focus in the Field list area, similar to selecting that item in the entity tree.
Accessing the Data Tree View
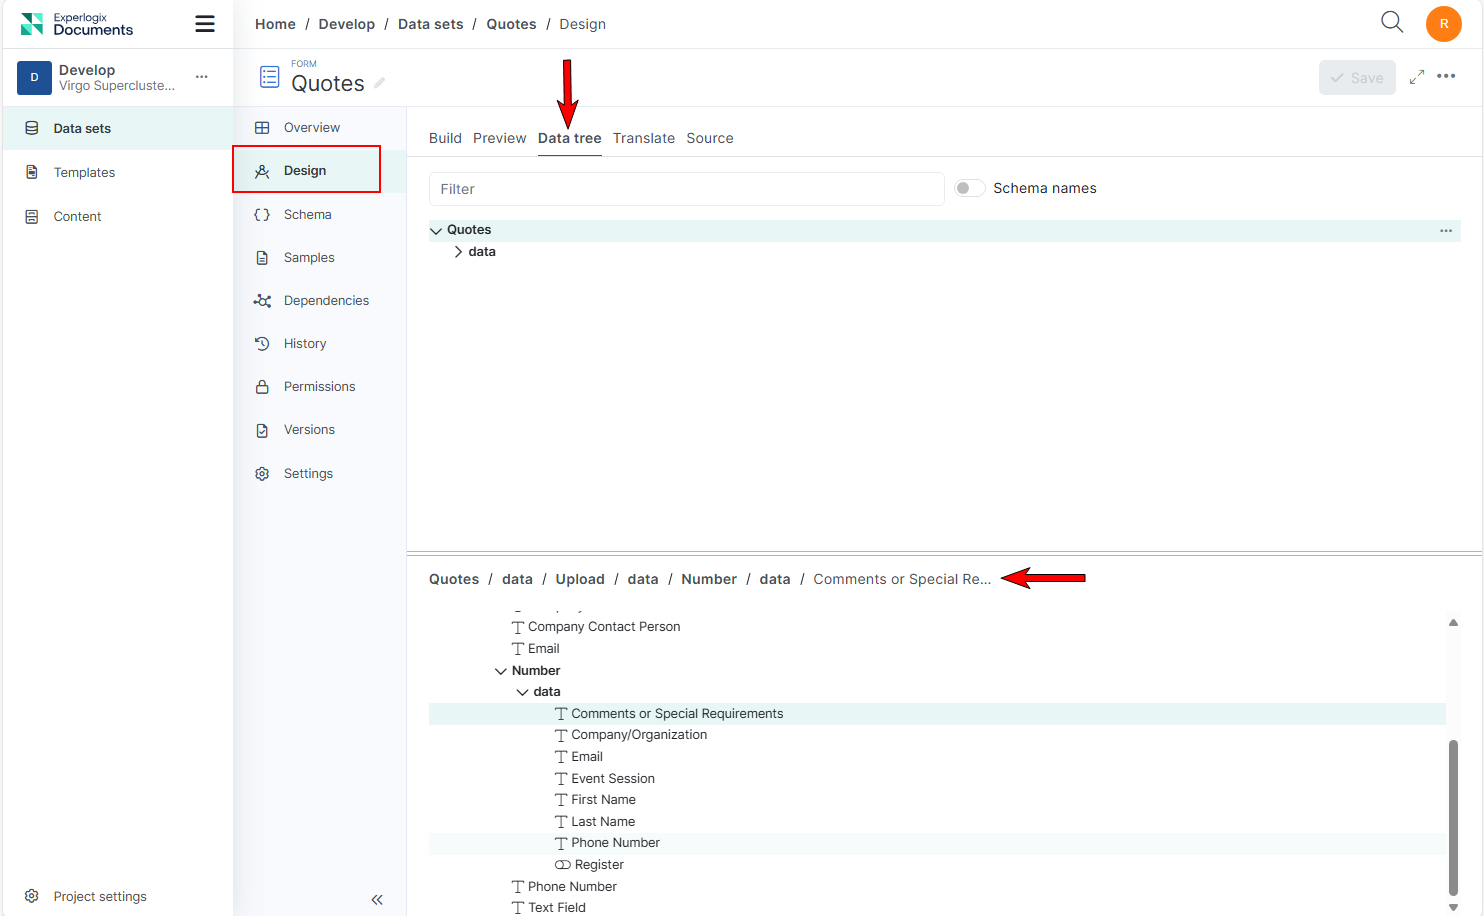
Data sets have a Data Tree view next to the Build view in the Data Sets Design tab for visualizing the Data Set in a tree structure.
Filtering on the Data Set Tree View
The Data Tree View allows users to filter and navigate through entities and fields efficiently, helping you quickly locate and identify the specific data you need within the data set structure.
You can search by:
-
Display name.
-
Schema name.
-
Actual sample values contained in your currently active sample.
Note: To allow filtering by sample value, make sure that a sample is selected.
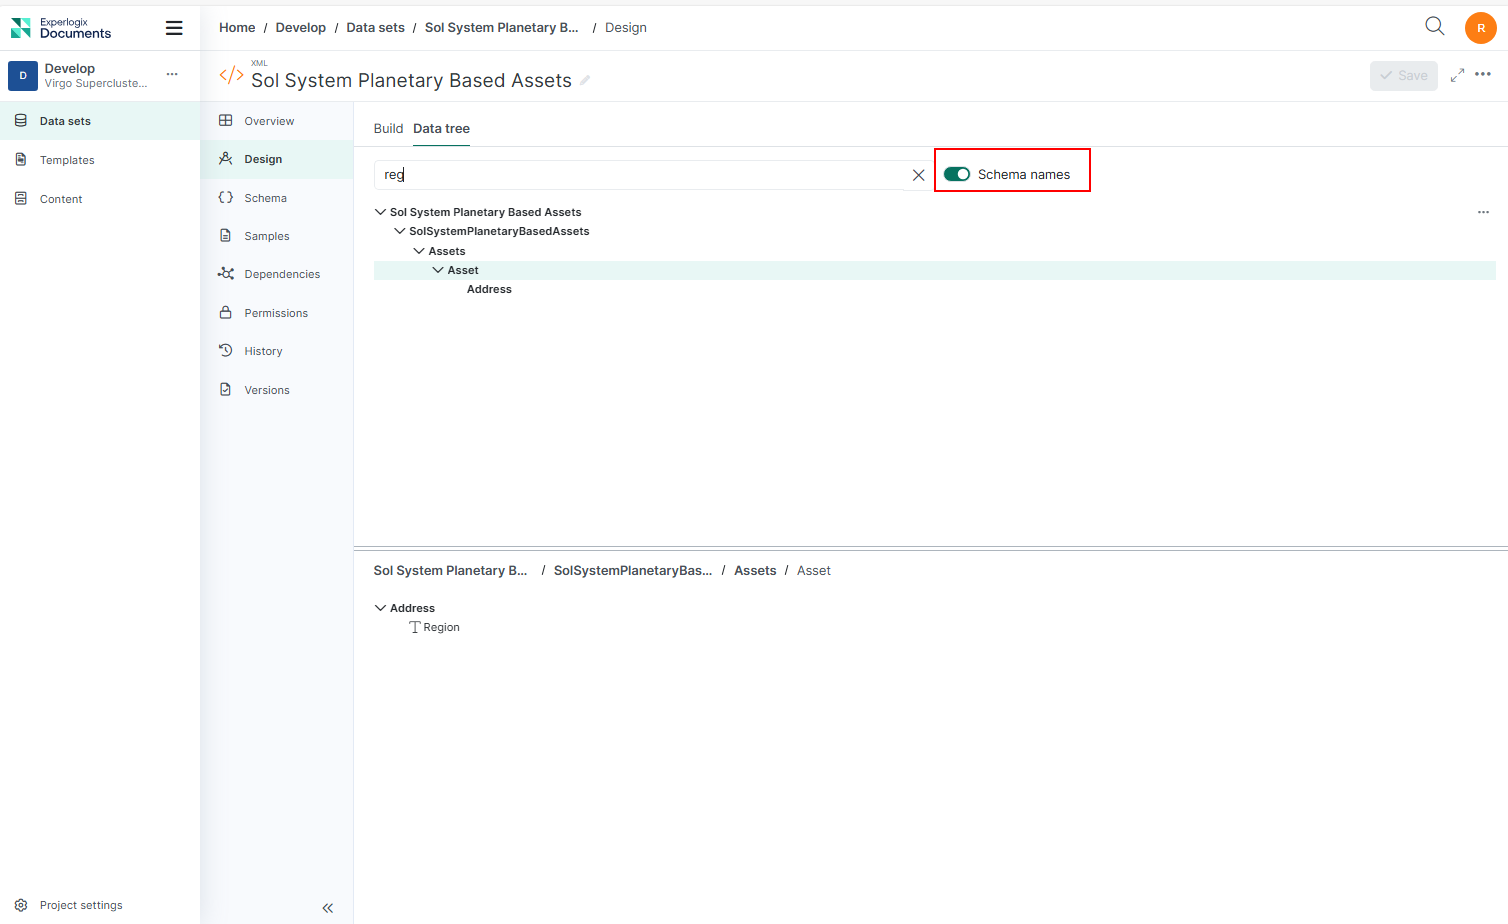
When the Schema names toggle is off, the entity name is displayed. When it is on, the schema name is displayed. Toggling the schema name when viewing a filtered list only changes the display and does not affect the search results. To filter using the schema name, you must search for the schema directly; simply toggling the display will not suffice.
If a search filter match is found within a collapsed view (e.g., parent entity, fields), the tree automatically expands to reveal the sub-entities or fields containing the matching filter value.
Viewing Sample Data in the Data Set Tree
Sample data allows you to explore and validate a data set using real, representative data instead of relying on the schema structure alone. It helps you understand how your data is populated, verify that fields contain the expected values, and quickly locate the fields you need by searching for values you recognize from your actual data.
Users can view real sample data directly within the Data Tree. Selecting a sample also enables the ability to search and filter the tree by sample values.
Note: If your data set does not have any samples associated with it yet, the "Select sample" option will be disabled.
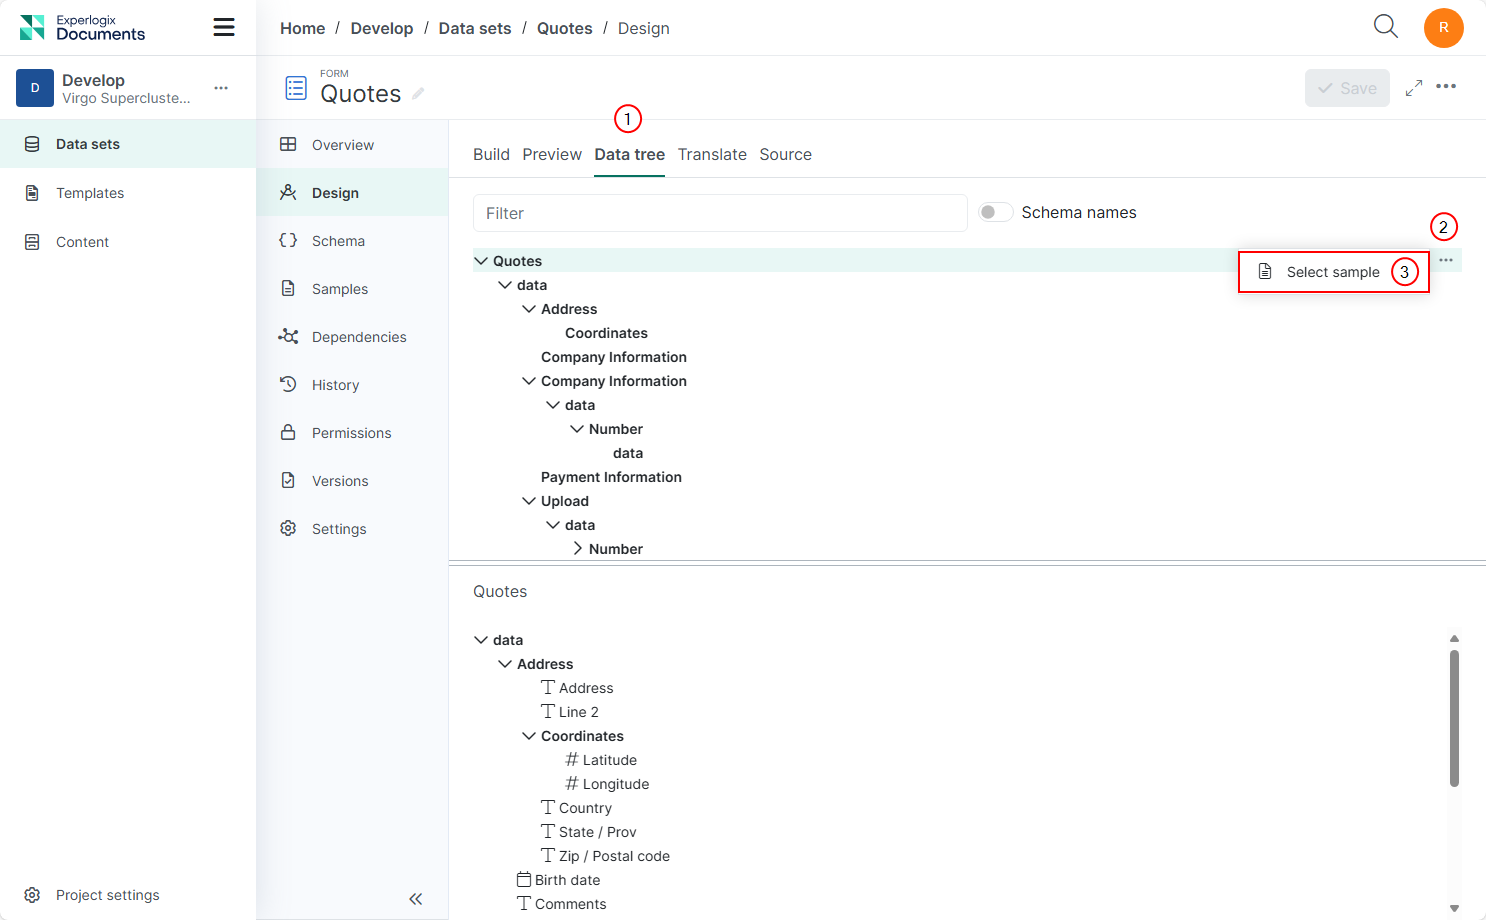
To select a sample:
-
Hover over the root entity of your data set.
-
Select the ellipsis menu (...) that appears next to the root name.
-
Select Select sample from the actions menu.
-
Choose a sample from the dropdown list in the modal window and confirm Select.
Once selected, the sample name is displayed next to the root entity, and the actual sample values will appear alongside their corresponding fields in the Field list area.
Filtering Collections by Sample Value
If your filter matches only some items in a collection, the collection's item counter (e.g., [1/6]) will dynamically adjust to allow navigation only between the matching items. This ensures that the matching field remains visible on your screen while you navigate. Clearing the filter restores the original counter and item selection.
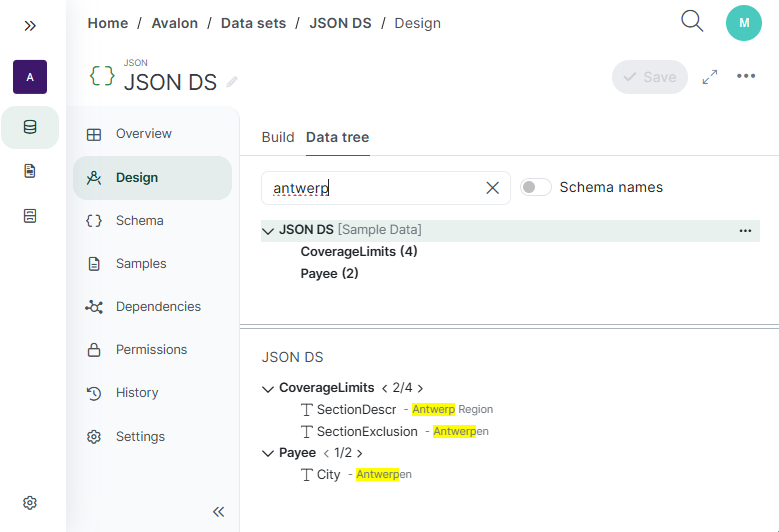
See PDF Templates to read about Filtering the Data Tree Using Sample Values in the PDF Template designer.
Procedures
Import a Schema
The Import Schema process allows you to import a schema from either a JSON or XML data set.
Experlogix Documents only supports importing schemas with JSON extensions for JSON imports and only XSD files for XML imports.
-
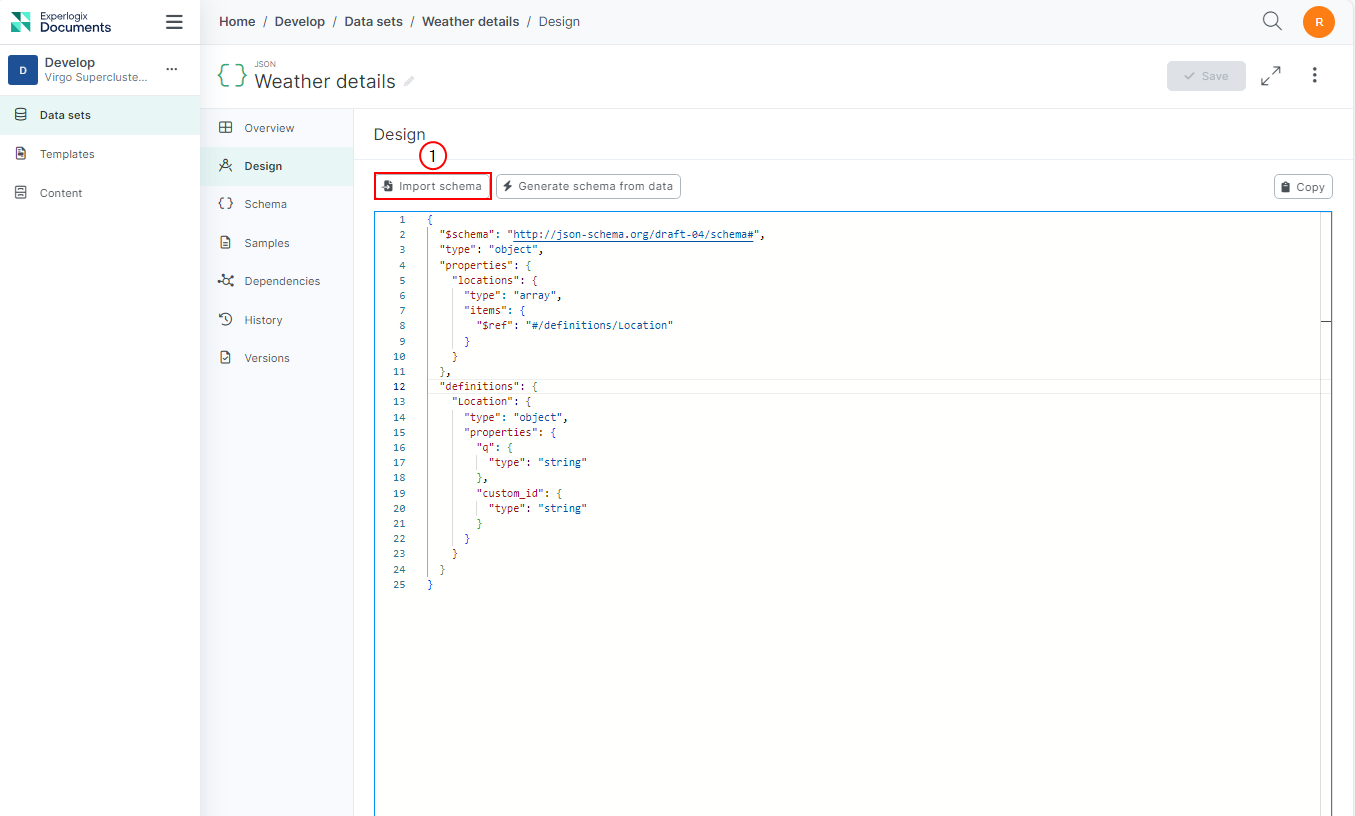
In the Design tab, select the Import schema button.
-
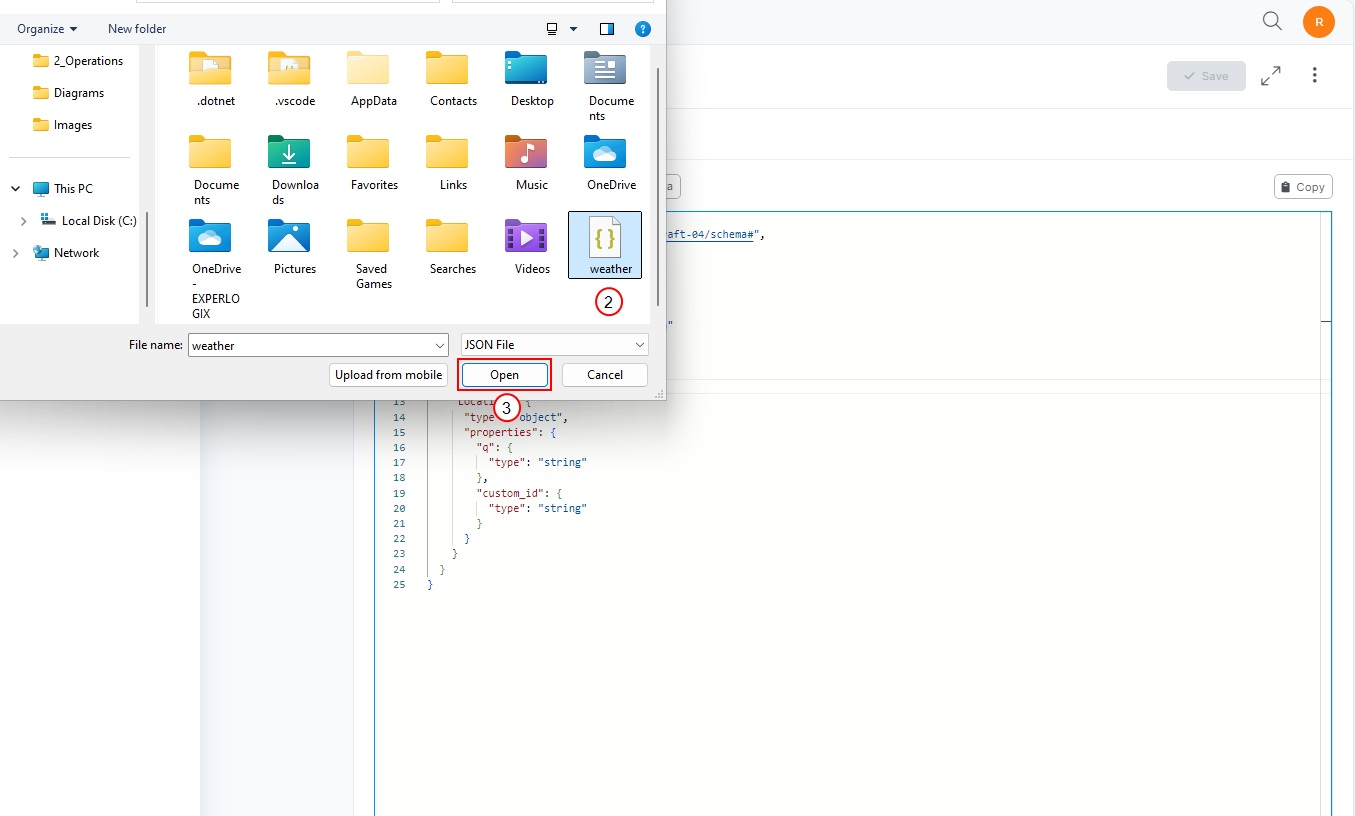
Select a JSON schema for JSON Data sets or XSD file for XML Data sets.
-
Select the Open button.
The data set schema displays in the Design Data set tab.
Generate a Schema from Data
Users can also generate a schema directly from their data via the Design tab. Data entered into the Design tab's code editor allows users to generate a schema based on JSON or XML data without importing a schema. However, when generating a schema from data, the schema is only as expansive as the data entered. Experlogix Documents does not extrapolate on the data entered to create additional nodes or logic.
-
In the Design tab, select the Generate schema from data button.
The Generate Schema window displays.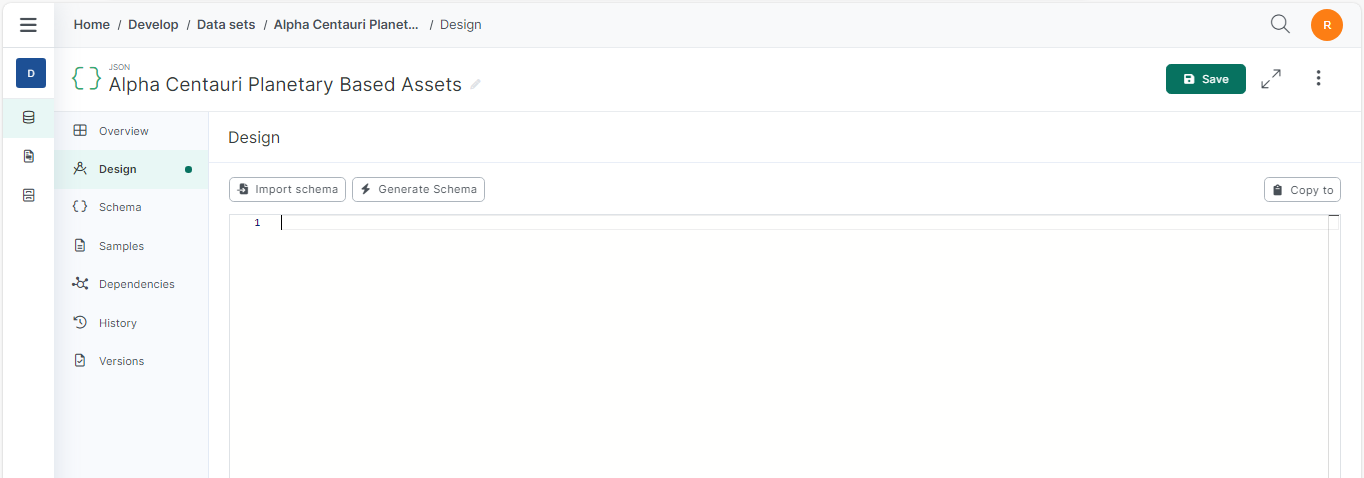
-
Paste your data into the Generate Schema window.
-
Select the Generate button.
The schema for your data set displays in the Design tab.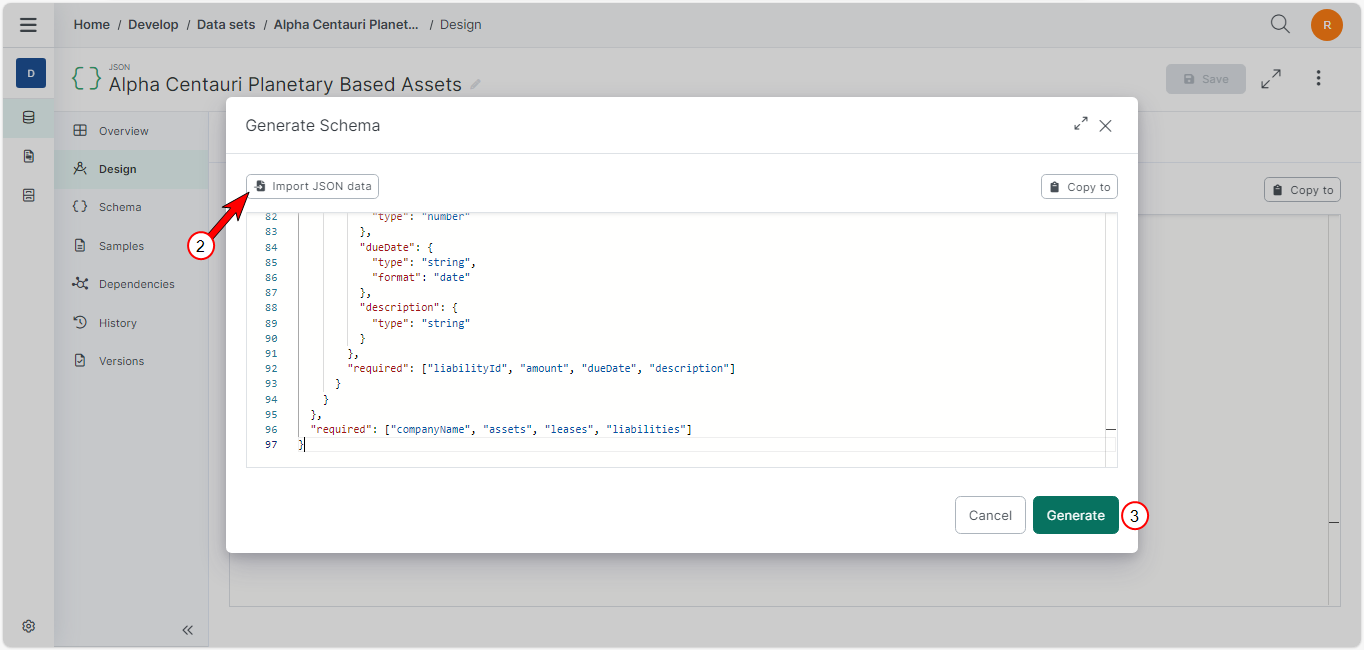
-
Select the Save button.
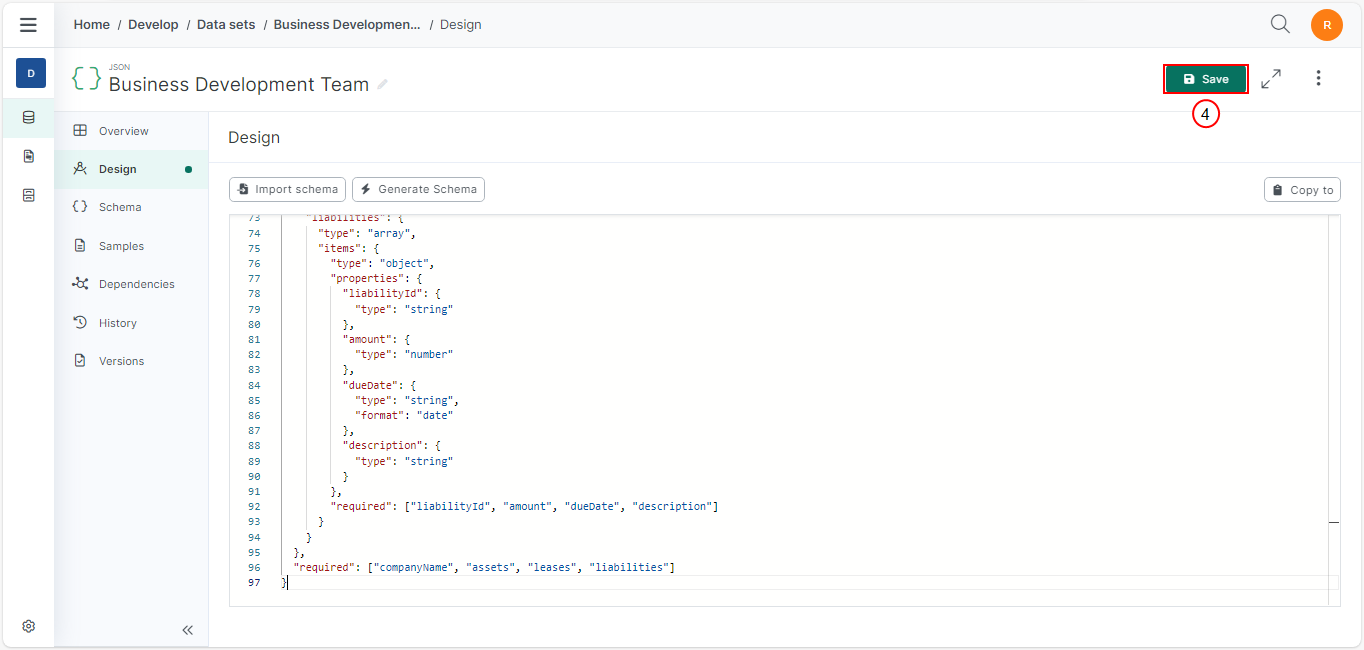
A confirmation message displays.
You've successfully generated a schema based on data entered via the Design tab code editor.
Editing a Schema
When working with JSON or XML Data Sets in Experlogix Documents, users can actively write, design, and import schemas using the Experlogix Documents code editor. This ensures a seamless experience for users, supporting both active design and easy imports.
Code Editor Functionality
|
Action |
Description |
|---|---|
|
Active Editing |
Type JSON/XML code directly into the editor. |
|
Pasting |
Paste JSON/XML text into the editor. |
|
Drag and Drop |
Import JSON/XML schema files by dragging and dropping them into the editor. |
Code Validation
|
Validation Type |
Description |
|---|---|
|
Syntax Validation |
The editor checks for syntax errors in real time, providing immediate feedback. |
|
Schema Validation |
The editor validates the content to ensure it conforms to JSON or XML schema standards. |
Add Translations to a Form Data Set
Experlogix Documents integrates form translation when creating forms. You can create your form in your project's default language first and then translate it, or you can create and translate your form during the creation process. It is essential that you use the form keys to complete the translation.
-
From the Landing Page, select a Project.
-
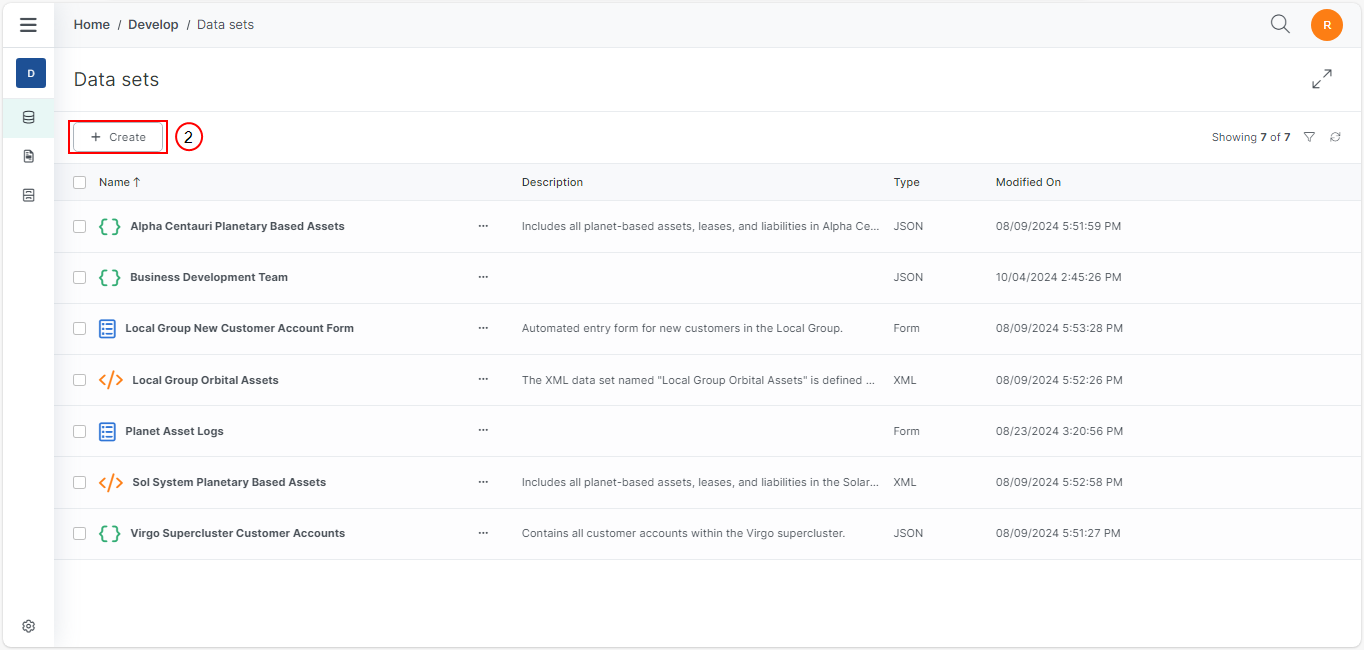
Select +Create.
-
In the Create data set dialog, add a name for your form.
-
In the Type field, select Form.
-
Select Create.
-
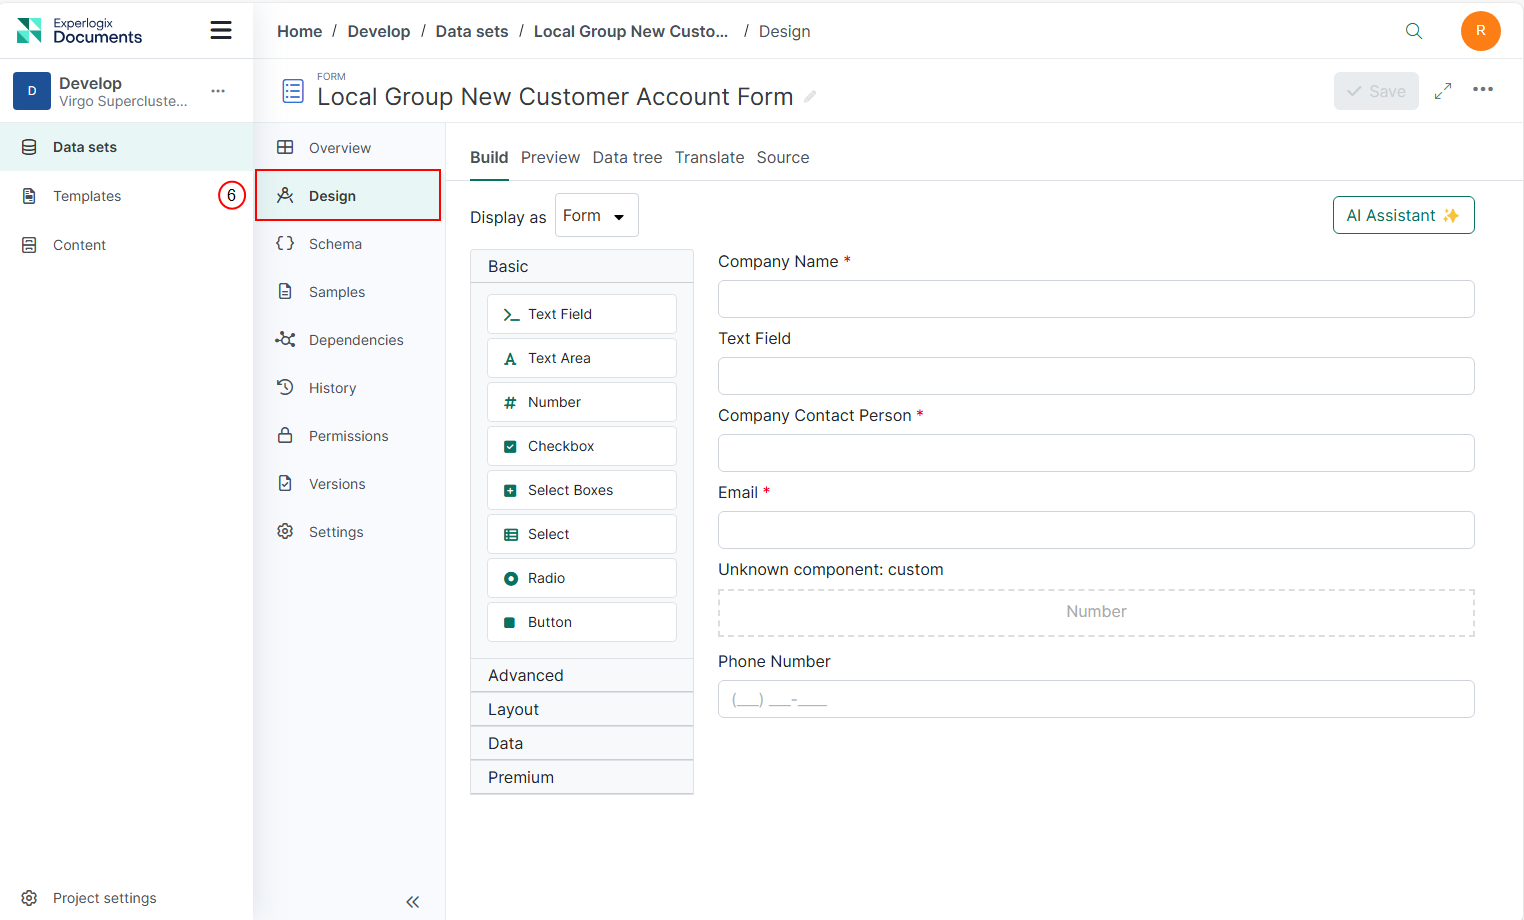
In the Form Data Set page, select the Design tab.
-
Select the Build tab and create your form.
-
To translate your form into a different language, select the Translate tab and select + Add language.
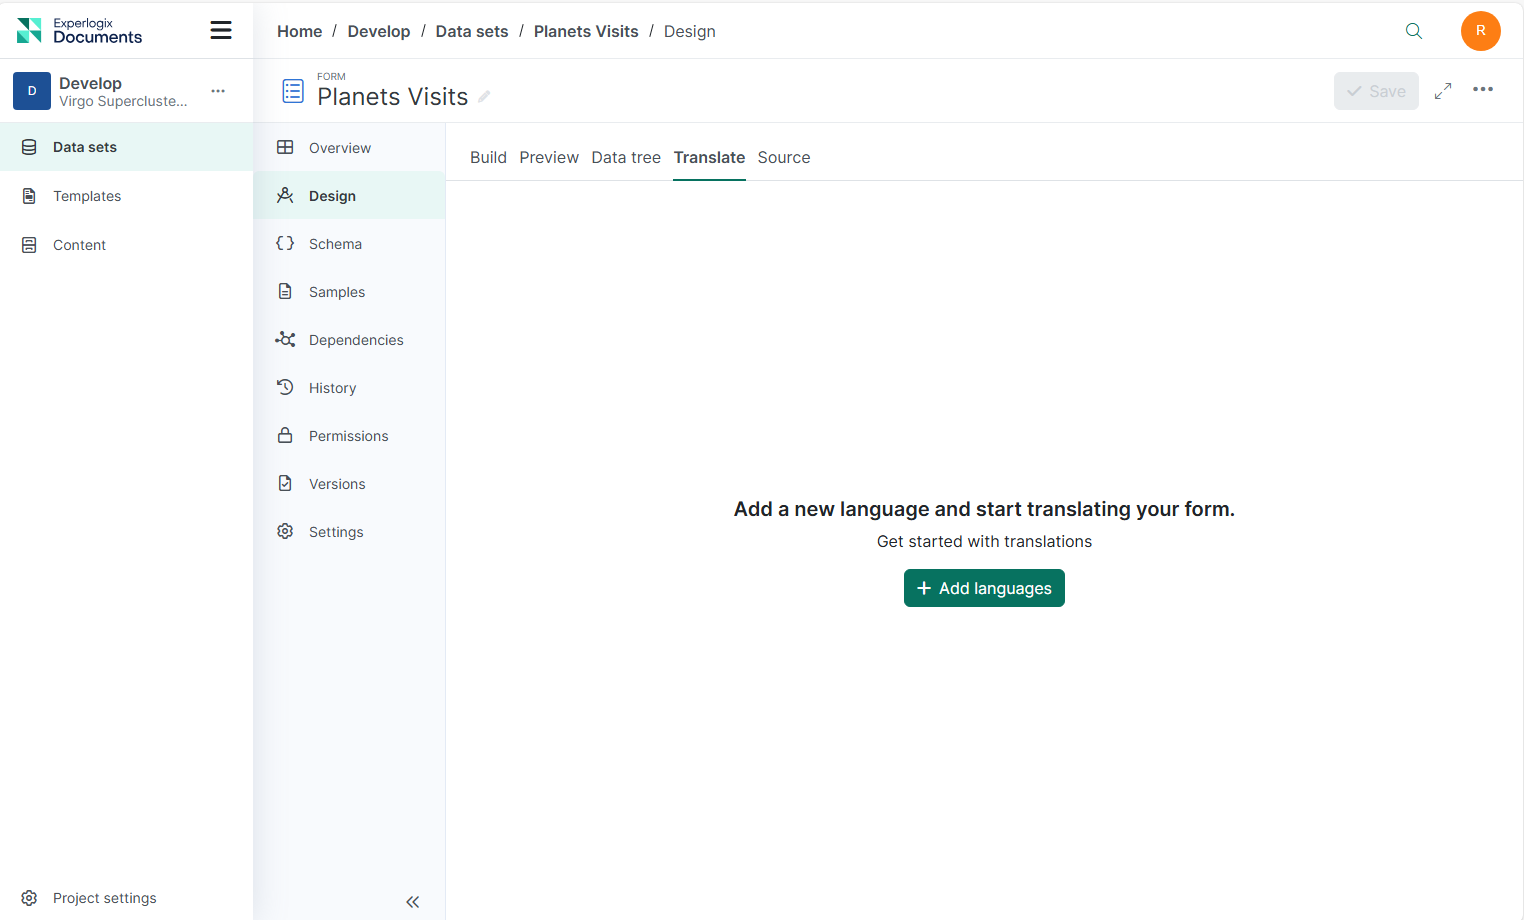
The Add language button is only available if your form data set has no existing translations.
-
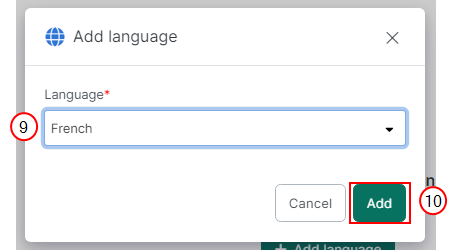
In the Add language dialog box from the drop-down menu select the language you want to translate the form to.
-
Select Add.
-
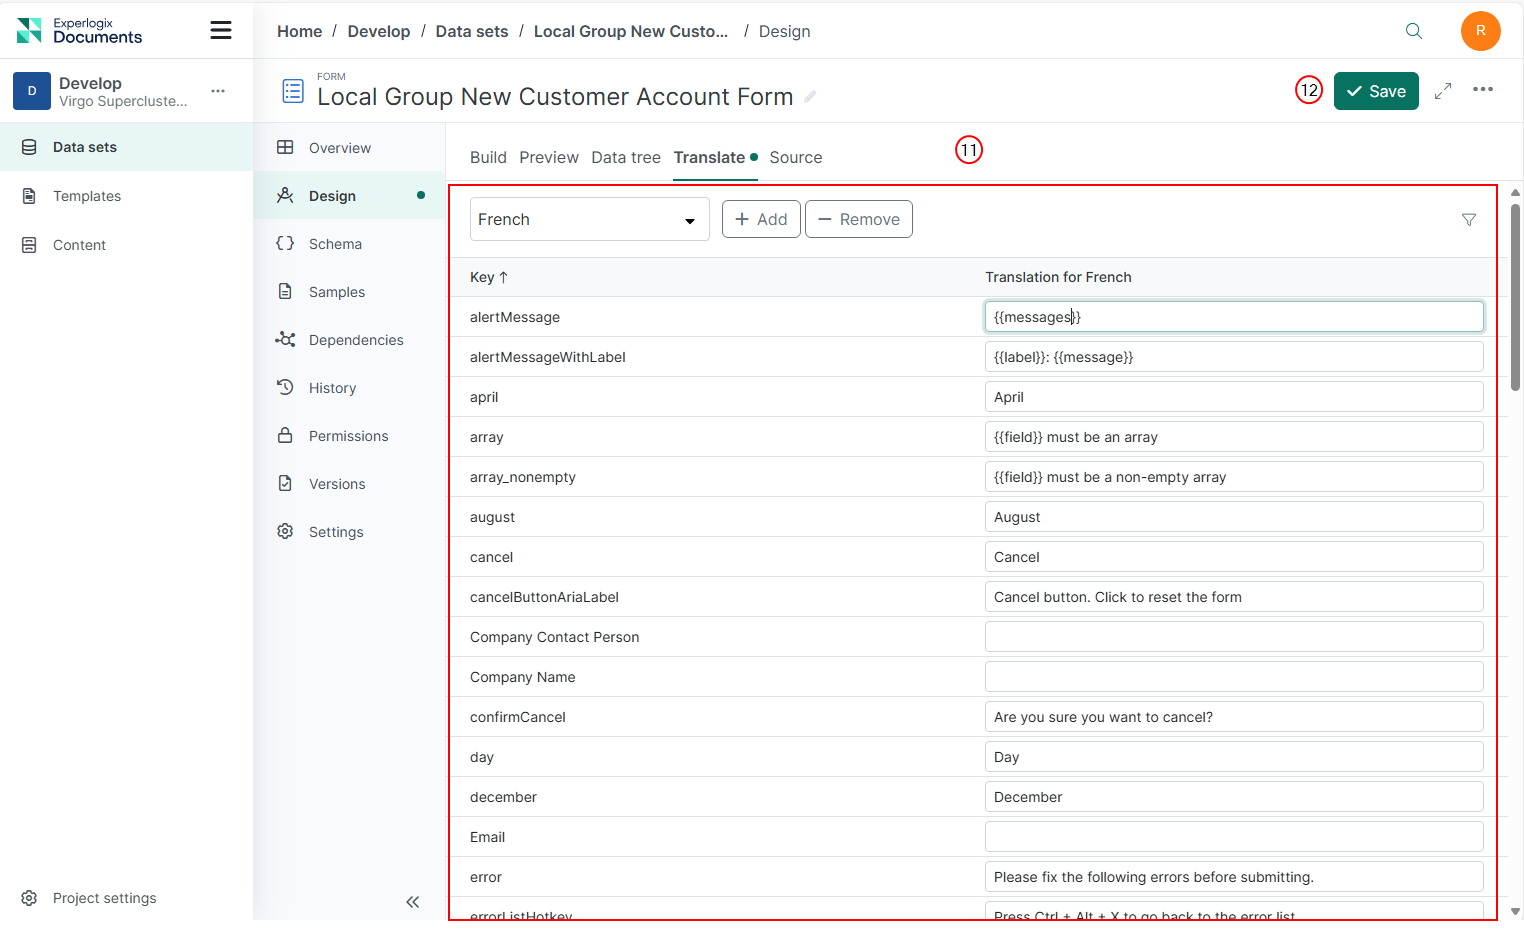
In the Translate tab, using the form keys, fill in the fields for the language selected.
Field names are only provided in the standard language of your form. If you wish to translate it into a different language, you must provide the translation yourself. You can translate all the field names or translate only the field names you need.
-
Select Save.
The changes to your Form Data are saved and ready for use.
Preview Form Translations
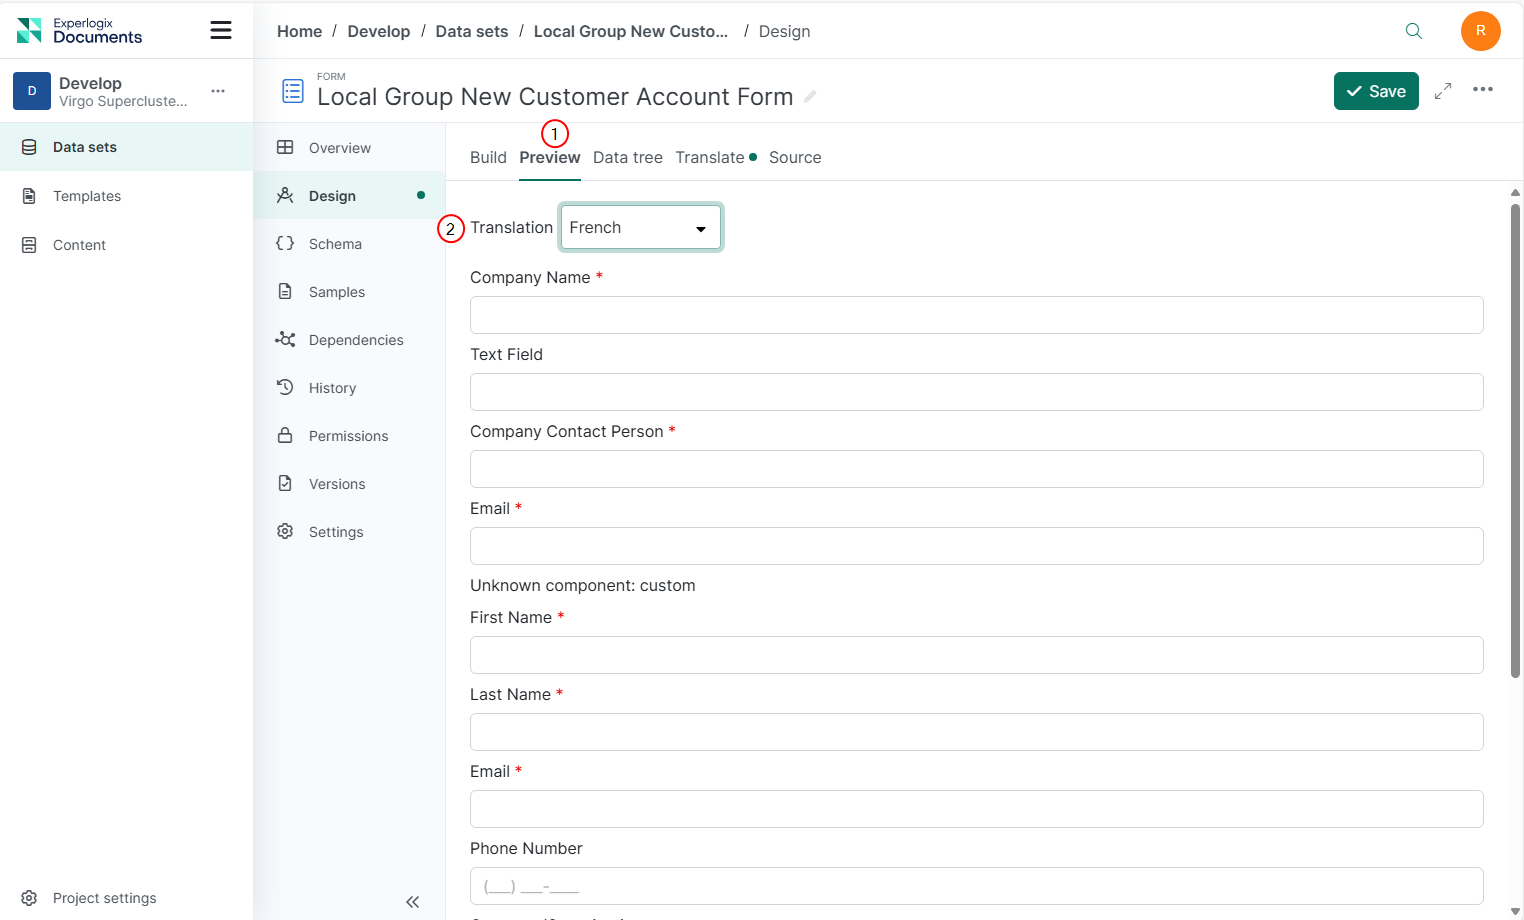
Previewing your translated form is easy and can be done as you create it. The Preview tab allows you to view the entire form and verify it matches your needs.
-
Under Design in the Form Data Set, select the Preview tab.
-
From the Translation dropdown menu, select the translation language.
The translated version of the form displays.
To make changes to your form, select the Design tab to add or remove fields.
Understanding Samples in Data Tree View
Samples allow you to visualize and interact with your data sets using actual field values in the Data Tree View. Instead of displaying field names, they provide a preview of how data appears in runtime, helping to validate the structure and formatting of your data sets. This functionality streamlines data exploration, making it easier to test, troubleshoot, and refine data sets before full processing of data sets. Whether working with Forms, XML, or JSON, samples offer a realistic way to assess and interact with the data sets.
Selecting a Sample to View a Data Tree with its Field Values
To visualize the Data Tree View with relevant data, follow these steps:
-
Navigate to the Data Tree view.
-
Select the ellipsis menu of the data set root.
-
Select Select sample button.
-
From the dropdown menu, choose a sample.
The samples are listed in alphabetical order. If only one sample is available, it will be prefilled in the dropdown.
-
Select Select for confirmation.
The sample name displays at the data set root, and the sample values are displayed in the fields section.
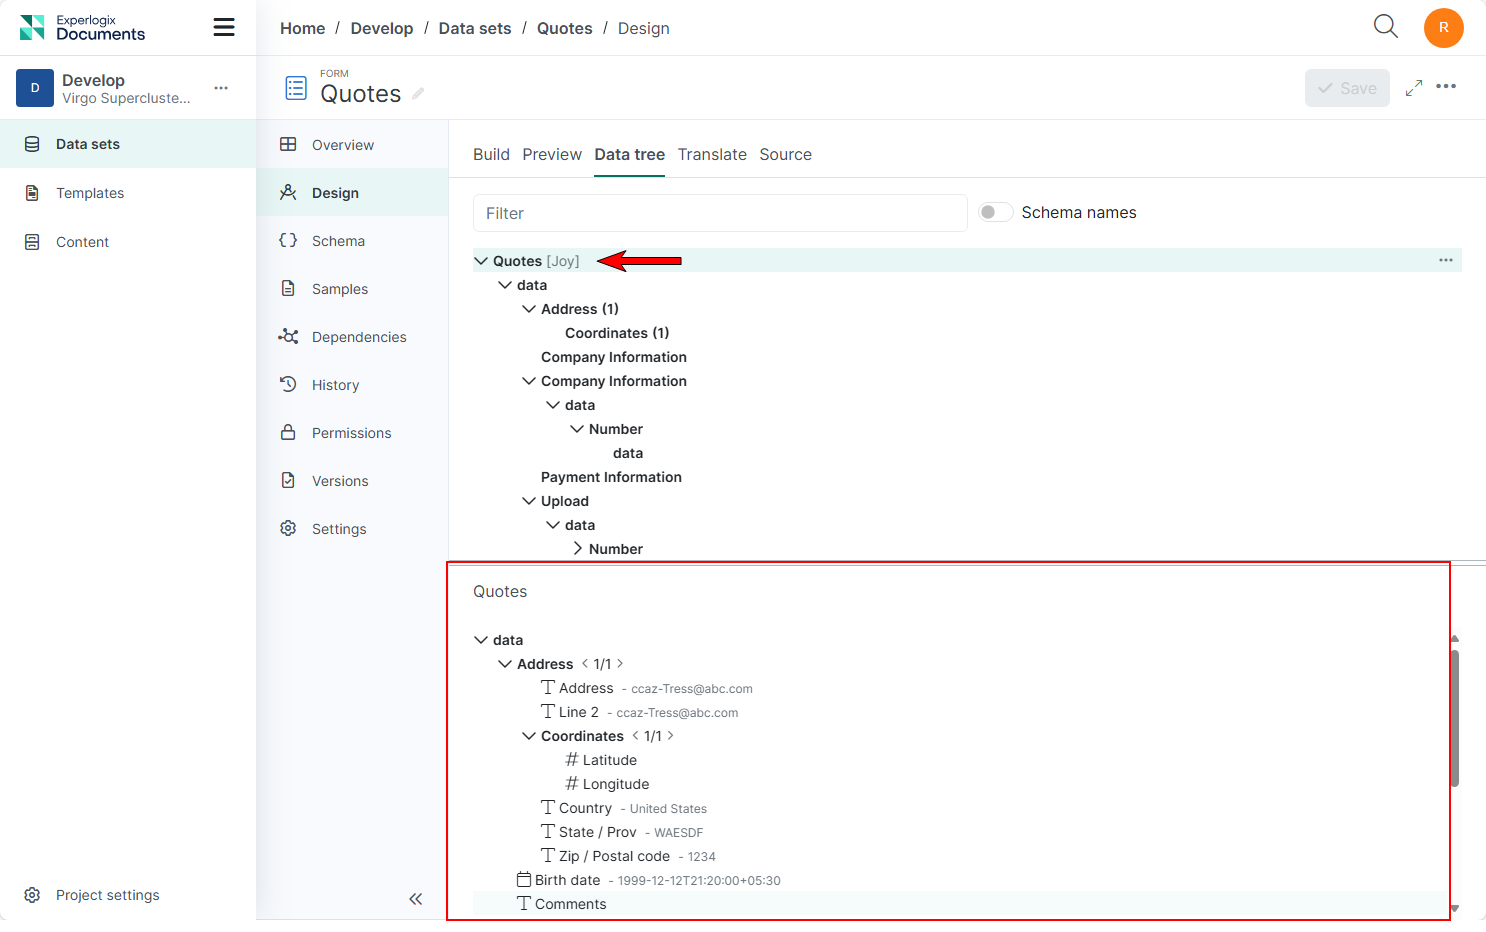
Selecting the ellipsis menu in the data set root provides options to clear or change the sample, allowing you to easily manage your data samples as needed.